- 2009 Toyota Prius Owners Manuals
- Toyota Prius Owners Manuals
- 2008 Toyota Prius Owners Manuals
- Toyota Prius Owners Manuals
- 2013 Toyota Prius Owners Manuals
- Toyota Prius Owners Manuals
- 2004 Toyota Prius Owners Manuals
- Toyota Prius Owners Manuals
- 2001 Toyota Prius Owners Manuals
- Toyota Prius Owners Manuals
- 2005 Toyota Prius Owners Manuals
- Toyota Prius Owners Manuals
- 2015 Toyota Prius Owners Manuals
- Toyota Prius Owners Manuals
- 2012 Toyota Prius Owners Manuals
- Toyota Prius Owners Manuals
- 2002 Toyota Prius Owners Manuals
- Toyota Prius Owners Manuals
- 2010 Toyota Prius Owners Manuals
- Toyota Prius Owners Manuals
- 2014 Toyota Prius Owners Manuals
- Toyota Prius Owners Manuals
- 2006 Toyota Prius Owners Manuals
- Toyota Prius Owners Manuals
- 2003 Toyota Prius Owners Manuals
- Toyota Prius Owners Manuals
- 2007 Toyota Prius Owners Manuals
- Toyota Prius Owners Manuals
- 2011 Toyota Prius Owners Manuals
- Toyota Prius Owners Manuals
- Download PDF Manual
-
an unexpected accident.
NOTICE
n To prevent 12 volt battery discharge
Do not leave the “POWER” switch in ACCESSORY or ON mode for long periods if the hybrid system is not running.
n When starting the hybrid system
l Do not race the hybrid system.
If the hybrid system becomes difficult to start or stalls frequently, have the hybrid system checked immediately.
135
PRIUS_U_(L/O_0802)
2-1. Driving procedures Transmission
Select a shift position appropriate for the driving conditions. n Shifting the shift lever
You can operate the shift lever only in “D”. Keep the shift lever in “N” for a while after you shift it to that position. The shift lever always returns to this original position after shifting operation.
ITY21P003
136
PRIUS_U_(L/O_0802)
2-1. Driving procedures
n Shift position uses
Shift position
Function
Parking the vehicle or starting the hybrid system
Reversing Neutral
Normal driving
Engine braking position*
*: Shown only while in “D” position.
Changing shift ranges in “P” position
With the brake pedal pressed down, push the “P” position switch. The “P” position is displayed on the instrument cluster, and the indicator on the “P” position switch comes on.
You can only shift to other posi- tion from “P” when the brake pedal is depressed.
ITY21P004
137
PRIUS_U_(L/O_0802)
2-1. Driving procedures
n Using engine brake
To use the engine braking, shift the shift lever to “B” position. l During high speed driving, you may feel that deceleration by engine brak-
ing is less than that of a typical vehicle.
l Do not continue normal driving with the transmission in “B” for a long
time. This may cause decreased fuel economy. To prevent this, use “D” for normal driving.
n Reverse warning buzzer
When shifting into “R”, a buzzer will sound to inform the driver that the shift lever is in “R”.
n If the system malfunctions
The following conditions, there is some problem in the system. Immediately stop the vehicle in a safe place and contact your Toyota dealer. l The indicator on the “P” position switch flashes. However, this does not indicate a malfunction unless a warning message appears in the touch screen.
l All frames of shift position indicators in the instrument cluster flash. l The parking system error message appears on the touch screen. l The instrument cluster and touch screen does not come on when the
“POWER” switch is in ON mode.
138
PRIUS_U_(L/O_0802)
2-1. Driving procedures
n Alarms
The following table describes circumstances and correction procedures when only alarms are sound.
Alarm
Situation
The driver attempts to shift out of the “P” position with- out pressing the brake pedal.
The “P” position switch is pressed while the vehicle is moving. The driver attempts to shift to the “R” position while the vehicle is in forward motion. The driver attempts to shift to the “D” position while the vehicle is in rearward motion. The driver attempts to select the “B” position while in a shift position other than “D” and “P”. The driver attempts to select the “B” position while in the “P” position.
If the driver’s door is opened when the transmis- sion is in “N”, “D” or “B”.
Interior alarm sounds once
Interior alarm beep sounds and warning message*
*: Follow the warning message displayed.
PRIUS_U_(L/O_0802)
Correction procedure The transmission will not move out of the “P” position, so press the brake pedal before attempting to shift again.
The transmission will automatically be set to the “N” position, so select the appropriate position.
The transmission will not move out of the “P” position.
Push the “P” position switch.
139
2-1. Driving procedures Turn signal lever (Type A)
Left turn Right turn Move and hold the lever partway to signal a lane change The left hand signal will flash until you release the lever. Move and hold the lever partway to signal a lane change The right hand signal will flash until you release the lever.
n Turn signals can be operated when The “POWER” switch is in ON mode.
n If the indicators flash faster than usual
Check that a light bulb in the front or rear turn signal lights has not burned out.
140
PRIUS_U_(L/O_0802)
2
2-1. Driving procedures Turn signal lever (Type B)
Left turn Right turn Move and hold the lever partway to signal a lane change The left hand signal will flash until you release the lever. Move and hold the lever partway to signal a lane change The right hand signal will flash until you release the lever.
n Turn signals can be operated when The “POWER” switch is in ON mode.
n If the indicators flash faster than usual
Check that a light bulb in the front or rear turn signal lights has not burned out.
141
PRIUS_U_(L/O_0802)
2-1. Driving procedures Parking brake
Sets the parking brake* (Depressing the pedal again releases the parking brake.)
*: Fully depress the parking brake pedal with your left foot while depressing the brake pedal with your right foot.
U.S.A.
Canada
ITY21P007
NOTICE
n Before driving
Fully release the parking brake. Driving the vehicle with the parking brake set will lead to brake components overheating, which may affect braking performance and increase brake wear.
n When parking the vehicle
Before you leave the vehicle, set the parking brake, push the “P” position switch and make sure that the vehicle does not move.
142
PRIUS_U_(L/O_0802)
2-2. Instrument cluster Gauges and meters
The following gauges and meters illuminate when the “POWER” switch is in ON mode.
Shift position indicator Displays the shift position Speedometer Displays the vehicle speed. Fuel gauge Displays the quantity of fuel remaining in the tank. Odometer Displays the total distance the vehicle has been driven. Trip meter Displays the distance the vehicle has been driven since the meter was last reset. Trip meters A and B can be used to record and display differ- ent distances independently.
143
PRIUS_U_(L/O_0802)
2-2. Instrument cluster
Odometer/trip meter and trip meter reset button
Odometer Trip meter A* Trip meter B*
*: Pushing and holding the but-
ton will reset the trip meter.
MPH or km/h button
The speed units can be selected MPH or km/h.
MA VO
km/h MPH
km/h MPH
ITY22P003
Instrument panel light control
The brightness of the instrument panel lights can be adjusted.
Brighter Darker
144
PRIUS_U_(L/O_0802)
2-2. Instrument cluster
NOTICE
n To prevent damage to the hybrid system and its components
The hybrid system may be overheating if the high coolant temperature warn- ing light is displayed on the touch screen. In this case, immediately stop the vehicle in a safe place. Check the hybrid system after it has cooled com- pletely. (→P. 456)
145
PRIUS_U_(L/O_0802)
2-2. Instrument cluster Indicators and warning lights
The indicator and warning lights on the instrument cluster and cen- ter panel inform the driver of the status of the vehicle’s various sys- tems.
Instrument cluster
Touch screen (Type A)
ITY22P006
146
PRIUS_U_(L/O_0802)
2-2. Instrument cluster
Touch screen (Type B)
ITY22P007
147
PRIUS_U_(L/O_0802)
2-2. Instrument cluster
n Indicators
The indicators inform the driver of the operating state of the vehicle’s various systems.
Turn signal indicator (→P. 140)
Headlight high beam indicator (→P. 150)
Headlight indicator (→P. 150)
Tail light indicator (→P. 150)
(U.S.A.)
(Canada)
Shift position and shift range indicators (→P. 136)
Cruise control indicator (→P. 164)
Slip indicator (→P. 170)
ON
SRS airbag on-off indi- cator (→P. 101)
Recirculate mode indi- cator (→P. 205, 212) Automatic air condi- tioner indicator (→P. 202, 209)
Windshield air flow indi- cator (→P. 205, 212)
Rear window and out- side rear view mirror defoggers indicator (→P. 217) Driving ready indicator (→P. 130) Immobilizer / Theft deterrent system indica- tor (→P. 81, 84)
148
PRIUS_U_(L/O_0802)
2-2. Instrument cluster
n Warning lights
Warning lights inform the driver of malfunctions in the indicated vehicle’s systems. (→P. 426)
(U.S.A.)
(U.S.A.)
red
(Canada)
yellow
(if equipped)
(U.S.A.)
(Canada)
(if equipped) *:These lights turn on when the “POWER” switch is turned to ON mode to indicate that a system check is being performed. They will turn off after the hybrid system is started is on, or after a few seconds. There may be a malfunction in a system if the lights do not come on, or turn off. Have the vehicle inspected by your Toyota dealer.
CAUTION
n If a safety system warning light does not come on
Should a safety system light such as ABS and the SRS airbag warning light not come on when you start the hybrid system, this could mean that these systems are not available to help protect you in an accident, which could result in death or serious injury. Have the vehicle inspected by your Toyota dealer immediately if this occurs.
149
PRIUS_U_(L/O_0802)
2-3. Operating the lights and windshield wipers Headlight switch (Type A)
The headlights can be operated manually or automatically.
U.S.A.
Canada
AU TO
The side marker, park- ing, tail, license plate and instrument panel lights turn on. The headlights and all lights listed above turn on. The headlights and all the lights listed above turn on and off auto- matically. (When the “POWER” switch is in ON mode.)
(if equipped)
ITY23P001
Turning on the high beam headlights
With the headlights on, push the lever forward to turn on the high beams. Pull the lever back to the center position to turn the high beams off. Pull the lever toward you to turn on the high beams. Release to turn them off. You can flash the high beams with the headlights on or off.
150
PRIUS_U_(L/O_0802)
2
2-3. Operating the lights and windshield wipers
n Daytime running light system (if equipped)
To make your vehicle more visible to other drivers, the headlights turn on automatically (at a reduced intensity) whenever the hybrid system is started and the parking brake is released. Daytime running lights are not designed for use at night.
n Headlight control sensor (if equipped)
The sensor may not function properly if an object is placed on the sensor, or any- thing that blocks the sensor is affixed to the windshield. Doing so the sensor detecting the level of ambient light and may cause the automatic headlight con- trol system to malfunction.
interferes with
n Automatic light off system
Opening the driver’s door with the “POWER” switch in ACCESSORY mode or OFF will turn the headlights and tail lights off. To turn the lights on again, switch to ON mode, or turn the light switch “OFF” once and then back to the
position.
or
n Automatic headlight leveling system (Vehicle with discharge head-
lights) The level of the headlights is automatically adjusted according to the number of passengers and the loading condition of the vehicle to ensure that the headlights do not interfere with other road users.
n If the
indicator flashes...
It may indicate a malfunction in the system. Contact your Toyota dealer.
n Customization
Settings (e.g. light sensor sensitivity) can be changed. (→P. 488)
151
PRIUS_U_(L/O_0802)
2-3. Operating the lights and windshield wipers
NOTICE
n To prevent 12 volt battery discharge
Do not leave the lights on longer than necessary if the hybrid system is not running.
152
PRIUS_U_(L/O_0802)
2
2-3. Operating the lights and windshield wipers Headlight switch (Type B)
The headlights can be operated manually or automatically.
U.S.A.
Canada
The side marker, park- ing, tail, license plate and instrument panel lights turn on. The headlights and all lights listed above turn on. The headlights and all the lights listed above turn on and off auto- matically. (When the “POWER” switch is in ON mode.)
(if equipped)
Turning on the high beam headlights
With the headlights on, push the lever forward to turn on the high beams. Pull the lever back to the center position to turn the high beams off. Pull the lever toward you to turn on the high beams. Release to turn them off. You can flash the high beams with the headlights on or off.
153
PRIUS_U_(L/O_0802)
2-3. Operating the lights and windshield wipers
n Daytime running light system (if equipped)
To make your vehicle more visible to other drivers, the headlights turn on automatically (at a reduced intensity) whenever the hybrid system is started and the parking brake is released. Daytime running lights are not designed for use at night.
n Headlight control sensor (if equipped)
The sensor may not function properly if an object is placed on the sensor, or any- thing that blocks the sensor is affixed to the windshield. Doing so the sensor detecting the level of ambient light and may cause the automatic headlight con- trol system to malfunction.
interferes with
n Automatic light off system
Opening the driver’s door with the “POWER” switch in ACCESSORY mode or OFF will turn the headlights and tail lights off. To turn the lights on again, switch to ON mode, or turn the light switch “OFF” once and then back to the
position.
or
n Automatic headlight leveling system (Vehicle with discharge head-
lights) The level of the headlights is automatically adjusted according to the number of passengers and the loading condition of the vehicle to ensure that the headlights do not interfere with other road users.
n If the
indicator flashes...
It may indicate a malfunction in the system. Contact your Toyota dealer.
n Customization
Settings (e.g. light sensor sensitivity) can be changed. (→P. 488)
154
PRIUS_U_(L/O_0802)
2-3. Operating the lights and windshield wipers
NOTICE
n To prevent 12 volt battery discharge
Do not leave the lights on longer than necessary if the hybrid system is not running.
155
PRIUS_U_(L/O_0802)
2-3. Operating the lights and windshield wipers Fog light switch (if equipped)
The fog lights improve visibility in difficult driving conditions, such as in rain or fog. They can be turned on only when the headlights are on low beam.
Type A
OFF ON
ITY23P004
156
PRIUS_U_(L/O_0802)
2-3. Operating the lights and windshield wipers
Type B
157
PRIUS_U_(L/O_0802)
2-3. Operating the lights and windshield wipers Windshield wipers and washer (Type A)
Wiper intervals can be adjusted for intermittent operation (when “INT” is selected).
windshield
Intermittent wiper operation Low speed windshield wiper operation High wiper operation Temporary operation
speed windshield
Wash/wipe operation
Wipers operate automatically.
ITY23P005
ITY23P007
158
PRIUS_U_(L/O_0802)
2-3. Operating the lights and windshield wipers
n The windshield wiper and washer can be operated when
The “POWER” switch is in ON mode.
n Intermittent windshield wiper interval (“INT”) mode
Intermittent windshield wiper interval adjustment (increase) Intermittent windshield wiper interval adjustment (decrease)
ITY23P008
n If no windshield washer fluid sprays
Check that the washer nozzles are not blocked and if there is washer fluid in the windshield washer fluid reservoir.
NOTICE
n When the windshield is dry
Do not use the wipers, as they may damage the windshield.
n When there is no washer fluid spray from the nozzle
Damage to the washer fluid pump may be caused if the lever is pulled toward you and held continually. n When a nozzle becomes block
Do not try to clear it with a pin or other object. The nozzle will be damaged.
159
PRIUS_U_(L/O_0802)
2-3. Operating the lights and windshield wipers Windshield wipers and washer (Type B)
Wiper intervals can be adjusted for intermittent operation (when
is selected).
windshield
Intermittent wiper operation Low speed windshield wiper operation High wiper operation Temporary operation
speed windshield
Wash/wipe operation
Wipers operate automatically.
ITY23P012
ITY23P013
160
PRIUS_U_(L/O_0802)
2-3. Operating the lights and windshield wipers
n The windshield wiper and washer can be operated when
The “POWER” switch is in ON mode.
n Intermittent windshield wiper interval mode
Intermittent windshield wiper interval adjustment (decrease) Intermittent windshield wiper interval adjustment (increase)
ITY23P014
n If no windshield washer fluid sprays
Check that the washer nozzles are not blocked and if there is washer fluid in the windshield washer fluid reservoir.
NOTICE
n When the windshield is dry
Do not use the wipers, as they may damage the windshield.
n When there is no washer fluid spray from the nozzle
Damage to the washer fluid pump may be caused if the lever is pulled toward you and held continually. n When a nozzle becomes block
Do not try to clear it with a pin or other object. The nozzle will be damaged.
161
PRIUS_U_(L/O_0802)
2-3. Operating the lights and windshield wipers Rear window wiper and washer (Type A)
Intermittent window wiper operation Normal window wiper oper- ation Washer/wiper dual opera- tion Washer/wiper dual opera- tion
ITY23P006
n The rear window wiper and washer can be operated when
The “POWER” switch is in ON mode.
NOTICE
n When the rear window is dry
Do not use the wipers, as they may damage the rear window.
162
PRIUS_U_(L/O_0802)
2-3. Operating the lights and windshield wipers Rear window wiper and washer (Type B)
Intermittent window wiper operation Normal window wiper oper- ation Washer/wiper dual opera- tion Washer/wiper dual opera- tion
ITY23P015
n The rear window wiper and washer can be operated when
The “POWER” switch is in ON mode.
NOTICE
n When the rear window is dry
Do not use the wipers, as they may damage the rear window.
163
PRIUS_U_(L/O_0802)
2-4. Using other driving systems Cruise control (if equipped)
Use the cruise control to maintain a set speed without using the accelerator. n Set the vehicle speed STEP 1
Turn the “ON-OFF” button ON. Push the button once more to deactivate the cruise control.
STEP 2
Accelerate or decelerate to the desired speed and press the lever down to set the cruise control speed.
n Adjusting the speed setting
Increase speed Decrease speed Hold the lever until the desired speed setting is obtained. the set Fine adjustment of speed (approximately 1.0 mph [1.6 km/h]) can be made by lightly pressing the lever up or down and releasing it.
164
PRIUS_U_(L/O_0802)
2
2-4. Using other driving systems
n Canceling and resuming regular acceleration
the brake pedal
Cancel Push the lever towards you to cancel cruise control. The setting is also canceled when is depressed. Resume To resume cruise control and return to the set speed, push the lever up.
n Cruise control can be set when
l The shift lever is in the “D” range. l Vehicle speed is between approximately 25 mph (40 km/h) and 125 mph
(200 km/h). n Accelerating
The vehicle can be accelerated normally. After acceleration, the set speed resumes.
n Automatic cruise control cancelation
The set speed is automatically canceled in any of the following situations. l Actual vehicle speed falls more than 10 mph (16 km/h) below the preset
vehicle speed
l Actual vehicle speed is below 25 mph (40 km/h) l Enhanced VSC is activated
n If the cruise control indicator light flashes
Turn the “ON-OFF” button off once, and then reactivate the system. If the cruise control speed cannot be set or if the cruise control cancels immediately after being activated, there may be a malfunction in the cruise control system. Have the vehicle inspected by your Toyota dealer.
165
PRIUS_U_(L/O_0802)
2-4. Using other driving systems
CAUTION
n To avoid operating the cruise control by mistake
Keep the “ON-OFF” button off when not in use.
n Situations unsuitable for cruise control
In heavy traffic
Do not use cruise control in any of the following situations. Doing so may result in control of the vehicle being lost and could cause seri- ous or fatal accident. l On roads with sharp bends l On slippery roads, such as those covered with rain, ice or snow l On winding roads l On steep hills
Vehicle speed may exceed the set speed when driving down a steep hill.
166
PRIUS_U_(L/O_0802)
2-4. Using other driving systems Rear view monitor system
The rear view monitor system assists the driver by displaying an image of the view behind the vehicle while reversing. The image is displayed in reverse on the screen. This allows the image to appear in the same manner as that of the rear view mirror.
Rear view image is displayed when the shift lever is in “R”.
If you move the lever out of “R”, the screen returns to the previous one.
ITY24P005
n Displayed area
the bumper or under
The area covered by the camera is lim- ited. Objects which are close to either corner of the bumper cannot be seen on the screen. The area displayed on the screen may vary according to vehicle orientation or road conditions.
167
ITY24P006
Corner of bumper
ITY24P007
PRIUS_U_(L/O_0802)
2-4. Using other driving systems
n Rear view monitor system camera
In the following cases, it may be difficult to see the images on the screen, even when the system is functioning correctly. • In the dark (e.g. at night). • If the temperature near the lens is
extremely high or low.
• If water droplets get on the camera, or when humidity is high (e.g. when it rains).
• If foreign matter (e.g. snow or mud)
get on the camera lens.
• If the sun or headlights are shining
directly into the camera lens.
If a bright light (for example, sunlight reflected off the vehicle body) is picked up by the camera, a smear effect* pecu- liar to the camera may occur. *:Smear effect—A phenomenon that occurs when a bright light (for example, sunlight reflected off the vehicle body) is picked up by the camera; when trans- mitted by the camera, the light source appears to have a vertical streak above and below it.
n Smear effect
ITY24P008
ITY24P009
168
PRIUS_U_(L/O_0802)
2-4. Using other driving systems
CAUTION
n When using the rear view monitor system, observe these precautions
to avoid an accident that could result in death or serious injuries. l Never depend solely on the monitor system when reversing. l Always check visually and with the mirrors to confirm your intended path is
clear.
l Depicted distances between objects and flat surfaces differ from actual
distances.
l Do not use the system if the back door is open.
n Conditions which may affect the rear view monitor system
If the back of the vehicle is hit, the camera’s position and mounting angle may change. Contact your Toyota dealer.
l Rapid temperature changes, such as when hot water is poured on the
vehicle in cold weather, may cause the system to function abnormally. If the camera lens is dirty, it cannot transmit a clear image. Rinse with water and wipe with a soft cloth. If extremely dirty, wash with a mild cleanser and rinse.
l The displayed image may be darker and moving images may be slightly
distorted when the system is cold.
169
PRIUS_U_(L/O_0802)
2-4. Using other driving systems Driving assist systems
To help enhance driving safety and performance, the following sys- tems operate automatically in response to various driving situations. Be aware, however, that these systems are supplementary and should not be relied upon too heavily when operating the vehicle. n ABS (Anti-lock Brake System)
Helps to prevent wheel lock when the brakes are applied suddenly, or if the brakes are applied while driving on a slippery road surface.
n Brake Assist
Generates an increased level of braking force after the brake pedal is depressed, when the system detects a panic stop situation.
n Enhanced VSC (Vehicle Stability Control) (If equipped)
Helps the driver to control skidding when swerving suddenly or turning on slippery road surfaces.
n EPS (Electric Power Steering)
Employs an electric motor to reduce the amount of effort needed to turn the steering wheel.
When the Enhanced VSC is operating
If the vehicle is in danger of slip- ping or the front wheels spin, the indicator flashes to indicate that the Enhanced VSC have been engaged.
A buzzer (intermittent) sounds to indicate that Enhanced VSC is operating. The slip indicator light flashes as well when ABS is operating.
ITY24P010
170
PRIUS_U_(L/O_0802)
2
2-4. Using other driving systems
n Sounds and vibrations caused by the ABS, BA and Enhanced VSC
l A sound may be heard from the hybrid system compartment when the hybrid system is started or just after the vehicle begins to move. This sound does not indicate that a malfunction has occurred in any of these systems.
l Any of the following conditions may occur when the above systems are
operating. None of these indicates that a malfunction has occurred. • Vibrations may be felt through the vehicle body and steering. • A motor sound may be heard after the vehicle comes to a stop. • The brake pedal may pulsate slightly after the ABS is activated. • The brake pedal may move down slightly after the ABS is activated.
n Reduced effectiveness of EPS
The effectiveness of EPS is reduced to prevent the system from overheating when there is frequent steering input over an extended period of time. The steering wheel may feel heavy as a result. Should this occur, refrain from excessive steering input or stop the vehicle and turn the hybrid system OFF. The system should return to normal within 10 minutes.
171
PRIUS_U_(L/O_0802)
2-4. Using other driving systems
CAUTION
n The ABS does not operate effectively when
l The limits of tire gripping performance have been exceeded. l The vehicle hydroplanes while driving at high speed on the wet or slick
road.
n Stopping distance when the ABS is operating on the wet or slick roads The ABS is not designed to shorten the vehicle’s stopping distance. Always maintain a sufficient distance from the vehicle in front of you in the following situations. l When driving on dirt, gravel or snow-covered roads l When driving with tire chains l When driving over bumps in the road l When driving over roads with potholes or roads with uneven pavement
n When the Enhanced VSC is activated
The slip indicator light flashes and a warning buzzer sounds. Always drive carefully. Reckless driving may cause an accident. Exercise particular care when the indicator light flashes and a buzzer sounds.
n Replacing tires
Make sure that all tires are of the same size, brand, tread pattern and total load capacity. In addition, make sure that the tires are inflated to the speci- fied tire pressure level. The ABS and Enhanced VSC will not function correctly if different tires are fitted on the vehicle. Contact your Toyota dealer for further information when replacing tires or wheels.
172
PRIUS_U_(L/O_0802)
2-5. Driving information Cargo and luggage
Take notice of the following information about storage precau- tions, cargo capacity and load.
l Stow cargo and luggage in the back door whenever possible.
Be sure all items are secured in place.
l Be careful to keep the vehicle level. Placing the weight as far
forward as possible helps maintain vehicle balance.
l For better fuel economy, do not carry unnecessary weight.
Capacity and distribution
Cargo capacity depends on the total weight of the occupants. (Cargo capacity) = (Total load capacity) — (Total weight of occupants) Steps for Determining Correct Load Limit— (1) Locate the statement “The combined weight of occupants and cargo should never exceed XXX kg or XXX lbs.” on your vehi- cle’s placard.
(2) Determine the combined weight of the driver and passengers
that will be riding in your vehicle.
(3) Subtract the combined weight of the driver and passengers from
XXX kg or XXX lbs.
(4) The resulting figure equals the available amount of cargo and
luggage load capacity. For example, if the “XXX” amount equals 1400 lbs. and there will be five 150 lb passengers in your vehicle, the amount of avail- able cargo and luggage load capacity is 650 lbs. (1400 - 750 (5
× 150) = 650 lbs.)(5) Determine the combined weight of luggage and cargo being
loaded on the vehicle. That weight may not safely exceed the available cargo and lug- gage load capacity calculated in Step 4.
173
PRIUS_U_(L/O_0802)
2-5. Driving information
(6)
If your vehicle will be towing a trailer, load from your trailer will be transferred to your vehicle. Consult this manual to determine how this reduces the available cargo and luggage load capacity of your vehicle. (→P. 176) Toyota does not recommend towing a trailer with your vehicle. Your vehicle is not designed for trailer towing.
Example on your vehicle
Cargo capacity Total load capacity
When 2 people with the combined weight of 366 lb. (166 kg) are riding in your vehicle, which has a total load capacity of 815 lb. (370
kg), the available amount of cargo and luggage load capacity will be as follows: 810 lb. — 366 lb. = 444 lb. (365 kg — 166 kg = 199 kg)In this condition, if 3 more passengers with the combined weight of 388 lb. (176 kg) get on, the available cargo and luggage load will be reduced as follows:
444 lb. — 388 lb. = 56 lb. (199 kg — 176 kg = 23 kg) As shown in the above example, if the number of occupants increases, the cargo and luggage load equaling the combined weight of the occupants who got on later, by an amount. In other words, if an increase in the number of occupants causes an excess of the total load capacity (combined weight of occupants plus cargo and luggage load), you must reduce the cargo and luggage on your vehicle.
174
PRIUS_U_(L/O_0802)
2-5. Driving information
CAUTION
n Storage precautions
l Do not place anything on the package tray behind the rear seatback. Such items may be thrown about and possibly injure people in the vehicle during sudden braking or in an accident.
l Do not drive with objects on top of the instrument panel.
They may interfere with the driver’s field of view or move during sharp acceleration or turning, thus impairing the driver’s control of the vehi- cle. In an accident they may injure the vehicle occupants.
l Secure all items in the occupant compartment, as they may shift and
injure someone during an accident or sudden braking.
n Weight of the load
Improper loading may cause deterioration of steering or braking con- trol resulting in an accident which may cause death or serious injury.
l Do not exceed the maximum axle weight rating or the total vehicle
weight rating.
l Even if the total load of occupant’s weight and the cargo load is less than the total load capacity, do not apply the load unevenly. Improper loading may cause deterioration of steering or braking control which may cause death or serious injury.
175
PRIUS_U_(L/O_0802)
2-5. Driving information Vehicle load limits
Vehicle load limits include total load capacity, seating capacity, towing capacity and cargo capacity. n Total load capacity: 810 lb. (365 kg)
Total load capacity means the combined weight of occupants, cargo and luggage.
n Seating capacity: 5 occupants (Front 2, Rear 3)
Seating capacity means the maximum number of occupants whose estimated average weight is 150 lb. (68 kg) per person. Even if the number of occupants are within the seating capacity, do not exceed the total load capacity.
n Towing capacity
Toyota does not recommend towing a trailer with your vehicle.
n Cargo capacity
Cargo capacity may increase or decrease depending on the weight and the number of occupants.
n Total load capacity and seating capacity
These details are also described on the tire and loading information label. (→P. 388)
CAUTION
n Overloading the vehicle
Do not overload the vehicle. It may not only cause damage to the tires, but also degrade steering and braking ability, resulting in an accident.
176
PRIUS_U_(L/O_0802)
2
2-5. Driving information Winter driving tips
Carry out the necessary preparations and inspections before driving the vehicle in winter. Always drive the vehicle in a manner appropri- ate to the prevailing weather conditions. n Pre-winter preparations
l Use fluids that are appropriate to the prevailing outside tem-
peratures. • Engine oil • Engine coolant • Washer fluid
l Have a service technician inspect the level and specific grav-
ity of 12 volt battery electrolyte.
l Have the vehicle fitted with four snow tires or purchase a set
of tire chains for the front tires. Ensure that all tires are the same size and brand, and that chains match the size of the tires.
177
PRIUS_U_(L/O_0802)
2-5. Driving information
n Before driving the vehicle
Perform the following according to the driving conditions. l Do not try to forcibly open a window or move a wiper that is frozen. Pour warm water over the frozen area to melt the ice. Wipe away the water immediately to prevent it from freezing. l To ensure proper operation of the climate control system fan, remove any snow that has accumulated on the air inlet vents in front of the windshield.
l Remove any ice that has accumulated on the vehicle chassis. l Periodically check for and remove any excess ice or snow that may have accumulated in the wheel well or on the brakes.
n When driving the vehicle
Accelerate the vehicle slowly and drive at a reduced speed suit- able to road conditions.
n When parking the vehicle
Park the vehicle and Push the “P” position switch without setting the parking brake. The parking brake may freeze up, preventing it from being released.
178
PRIUS_U_(L/O_0802)
2-5. Driving information
Regulations on the use of snow chains
l Regulations regarding the use of tire chains vary according to loca- tion and type of road. Always check local regulations before install- ing chains.
l Use SAE Class “S” type radial tire chains, with the exception of
radial cable chains or V-bar type chains. • • Refer to the explanation that comes with the tire chains for
Install the chains on the front tires.
installation instructions.
l Retighten the chains after driving 1/4 - 1/2 mile (0.5 - 1.0 km).
n Snow chain installation
Observe the following precautions when installing and removing chains.
Install and remove tire chains in a safe location. Install tire chains on the front tires. Install tire chains following the instructions provided in the accompanying instructions.
CAUTION
n Driving with snow tires
Observe the following precautions to reduce the risk of accidents. Failing to do so may result in a loss of vehicle control and cause death or serious injury. l Use tires of the size specified for your vehicle. l Maintain the specified level of tire inflation pressure. l Do not drive in excess of 75 mph (120 km/h), regardless of the type of
snow tires being used.
l Snow tires should be installed on all wheels.
179
PRIUS_U_(L/O_0802)
2-5. Driving information
CAUTION
n Driving with snow chains
Observe the following precautions to reduce the risk of accidents. Failing to do so may result in the vehicle being unable to be driven safely, and may cause death or serious injury. l Do not drive in excess of the speed limit specified for the tire chains being
used, or 30 mph (50 km/h), whichever is lower.
l Avoid driving on bumpy road surfaces or over potholes. l Avoid sudden turns and braking, as use of chains may adversely affect
vehicle handling.
l Slow down sufficiently before entering a curve to ensure that vehicle con-
trol is maintained.
NOTICE
n Repairing or replacing snow tires
Request repairs of and obtain replacement snow tires from Toyota dealers. This is because the removal and attachment of snow tires affects the opera- tion of the tire pressure warning valves and transmitters.
n Fitting tire chains
The tire pressure warning valves and transmitters may not function correctly when tire chains are fitted.
180
PRIUS_U_(L/O_0802)
2-5. Driving information Trailer towing
Toyota does not recommend towing a trailer with your vehicle. Toy- ota also does not recommend the installation of a tow hitch or the use of a tow hitch carrier for a wheelchair, scooter, bicycle, etc. Your Toyota is not designed for trailer towing or for the use of tow hitch mounted carriers.
ITY25P001
181
PRIUS_U_(L/O_0802)
2-5. Driving information Dinghy towing
Your vehicle is not designed to be dinghy towed (with 4 wheels on the ground) behind a motor home.
ITY25P002
NOTICE
n To avoid serious damage to your vehicle
Do not tow your vehicle with four wheels on the ground.
182
PRIUS_U_(L/O_0802)
2-5. Driving information
183
PRIUS_U_(L/O_0802)
v3-1.Using the touch screen Touch screen
By touching the screen with your finger, you can control the audio system and air-conditioning, adjust the screen display etc.
Vehicles with navigation system
Vehicles without navigation system (Type A)
186
PRIUS_U_(L/O_0802)
3-1. Using the touch screen
Vehicles without navigation system (Type B)
The “Information” screen shown in the above illustration is displayed when
the
is pressed.
Page
Switches
“CLIMATE” “AUDIO” “INFO” (Displaying the “Informa- tion” screen) “DISP” (Adjusting the display) Trip Information. (Displaying the “Trip Information” screen)
P. 201, 208
P. 219, 222P. 186
P. 192, 197
P. 27
Maintenance
Telephone
Calendar
Language Screen Setting
Navigation System Owner’s Man- ual P. 277
Navigation System Owner’s Man- ual P. 191, 196
P. 194, 199187
PRIUS_U_(L/O_0802)
3-1. Using the touch screen
The initial screen
Vehicles with navigation system and vehicles without navigation system (Type A)
If the “POWER” switch is set to ACCESSORY or ON mode, the initializing screen will be dis- played for a few seconds as the system starts up.
Vehicles without navigation system (Type B)
188
PRIUS_U_(L/O_0802)
3-1. Using the touch screen
Outside temperature display
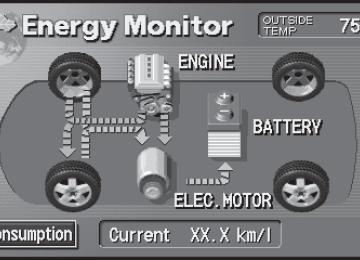
The outside temperature is shown ranging from -22 °F (-30 °C) up to 122 °F (50 °C) at the upper right of the energy consumption or energy monitor screen or the upper left/right of the air conditioner screen.
Vehicles with navigation system and vehicles without navigation system (Type A)
189
Vehicles without navigation system (Type B)
MPGMPG
ITY31P017
PRIUS_U_(L/O_0802)
3-1. Using the touch screen
n To avoid damaging the touch screen
l Touch the screen lightly with your finger. If there is no response, remove
your finger from the screen and try again.
l Remove any dirt on the screen by wiping with a soft cloth. Do not use
detergent.
n When using the touch screen
If the screen is cold, the display may be dark, or the system may seem to be operating slightly slower than normal.
l The screen may seem dark and hard to see when viewed through sun- glasses. Change your angle of viewing, adjust the display on he “Display” screen or remove your sunglasses.
n When the outside temperature drops below 37 °F (3 °C).
Also except the screen where outside temperature is displayed, outside tem- * are displayed in the upper portion of the screen for a perature and few seconds. *:
may not be displayed depending on the display type.
190
PRIUS_U_(L/O_0802)
3-1. Using the touch screen Setting the touch screen (Vehicles with AUX adapter)
You can change the touch screen to your desired settings.
Language settings
The language used for all voice guidance, messages and touch screen switches may be changed.
STEP 1
Press
STEP 2
Touch
on the “Information” screen.
STEP 3
Select the desired language.
STEP 4
Touch
Turning off the beep sound (if equipped)
The beep that sounds when a touch screen button is touched can be turned off. STEP 1
Press
191
PRIUS_U_(L/O_0802)
3-1. Using the touch screen
STEP 2
Touch
Adjusting the display
STEP 1
STEP 2
Press Adjust the display as desired using If you do not touch the screen for 20 seconds, the system will return to the previous screen.
and
Contrast Brightness
Weaker Darker
Stronger Brighter
192
PRIUS_U_(L/O_0802)
n “Day Mode”
3-1. Using the touch screen
When the headlights are turned on, the screen dims. However the screen can be switched to “Day Mode”.
The screen will stay in “Day Mode” when the headlights are turned on until
is touched again.
If the instrument panel light control is set to “MAX”, “Day Mode” is not dis- played.
n To turn off the picture display
is touched, the screen display is turned off, and guidance is by
If voice only.