- Download PDF Manual
-
(GMNA-Localizing-U.S./Canada/Mexico-
Black plate (9,1)
If possible, use Roadside Assistance. See Roadside Assistance Program on page 13-5. To get help and keep everyone in the vehicle safe:
Turn on the hazard warning flashers. Tie a red cloth to an outside mirror.
{ Warning
Snow can trap engine exhaust under the vehicle. This may cause exhaust gases to get inside. Engine exhaust contains carbon monoxide (CO) which cannot be seen or smelled. It can cause unconsciousness and even death. If the vehicle is stuck in the snow: . Clear away snow from around
the base of your vehicle, especially any that is blocking the exhaust pipe.
(Continued)
Warning (Continued)
. Check again from time to
time to be sure snow does not collect there.
. Open a window about 5 cm
(2 in) on the side of the vehicle that is away from the wind to bring in fresh air.
. Fully open the air outlets on
or under the instrument panel.
. Adjust the climate control
system to a setting that circulates the air inside the vehicle and set the fan speed to the highest setting. See “Climate Control Systems”.
For more information about carbon monoxide, see Engine Exhaust on page 9-26.
To save fuel, run the engine for only short periods as needed to warm the vehicle and then shut the engine off and close the window most of
Driving and Operating
9-9
the way to save heat. Repeat this until help arrives but only when you feel really uncomfortable from the cold. Moving about to keep warm also helps. If it takes some time for help to arrive, now and then when you run the engine, push the accelerator pedal slightly so the engine runs faster than the idle speed. This keeps the battery charged to restart the vehicle and to signal for help with the headlamps. Do this as little as possible to save fuel.
If the Vehicle Is Stuck Slowly and cautiously spin the wheels to free the vehicle when stuck in sand, mud, ice, or snow. If stuck too severely for the traction system to free the vehicle, turn the traction system off and use the rocking method. See Traction Control/Electronic Stability Control on page 9-32.
Chevrolet Malibu Owner Manual 6081487) - 2014 - CRC - 11/19/13
(GMNA-Localizing-U.S./Canada/Mexico-
Black plate (10,1)
9-10
Driving and Operating
{ Warning
If the vehicle's tires spin at high speed, they can explode, and you or others could be injured. The vehicle can overheat, causing an engine compartment fire or other damage. Spin the wheels as little as possible and avoid going above 56 km/h (35 mph).
Rocking the Vehicle to Get it Out Turn the steering wheel left and right to clear the area around the front wheels. Turn off any traction system. Shift back and forth between R (Reverse) and a low forward gear, spinning the wheels as little as possible. To prevent transmission wear, wait until the wheels stop spinning before shifting gears. Release the accelerator pedal while shifting, and press lightly on the accelerator pedal when the transmission is in gear.
Slowly spinning the wheels in the forward and reverse directions causes a rocking motion that could free the vehicle. If that does not get the vehicle out after a few tries, it might need to be towed out. If the vehicle does need to be towed out, see Towing the Vehicle on page 10-95.
Vehicle Load Limits It is very important to know how much weight the vehicle can carry. This weight is called the vehicle capacity weight and includes the weight of all occupants, cargo, and all nonfactory-installed options. Two labels on the vehicle show how much weight it may properly carry, the Tire and Loading Information label and the Certification label.
{ Warning
Do not load the vehicle any heavier than the Gross Vehicle Weight Rating (GVWR), or either the maximum front or rear Gross Axle Weight Rating (GAWR). This can cause systems to break and change the way the vehicle handles. This could cause loss of control and a crash. Overloading can also shorten the life of the vehicle.
Chevrolet Malibu Owner Manual 6081487) - 2014 - CRC - 11/19/13
(GMNA-Localizing-U.S./Canada/Mexico-
Black plate (11,1)
Tire and Loading Information Label
Label Example
1. Number of Occupant Seating
Positions
2. Maximum Vehicle Capacity
Weight
3. Size of the Original
Equipment Tires
4. Recommended Cold Tire
Inflation Pressure
A vehicle-specific Tire and Loading Information label is attached to the vehicle's center
pillar (B-pillar). The Tire and Loading Information label shows the number of occupant seating positions (1), and the maximum vehicle capacity weight (2) in kilograms and pounds. The Tire and Loading Information label also shows the tire size of the original equipment tires (3) and the recommended cold tire inflation pressures (4). For more information on tires and inflation see Tires on page 10-44 and Tire Pressure on page 10-53. There is also important loading information on the Certification label. It tells you the Gross Vehicle Weight Rating (GVWR) and the Gross Axle Weight Rating (GAWR) for the front and rear axle. See “Certification Label” later in this section.
Driving and Operating
9-11
“Steps for Determining Correct Load Limit– 1. Locate the statement "The
combined weight of occupants and cargo should never exceed XXX kg or XXX lbs." on your vehicle’s placard.
2. Determine the combined weight of the driver and passengers that will be riding in your vehicle.
3. Subtract the combined weight of the driver and passengers from XXX kg or XXX lbs.
4. The resulting figure equals
the available amount of cargo and luggage load capacity. For example, if the "XXX" amount equals 1400 lbs. and there will be five 150 lb passengers in your vehicle, the amount of available cargo
Chevrolet Malibu Owner Manual 6081487) - 2014 - CRC - 11/19/13
(GMNA-Localizing-U.S./Canada/Mexico-
Black plate (12,1)
9-12
Driving and Operating
and luggage load capacity is 650 lbs. (1400-750 (5 x 150) = 650 lbs.)
5. Determine the combined
6.
weight of luggage and cargo being loaded on the vehicle. That weight may not safely exceed the available cargo and luggage load capacity calculated in Step 4. If your vehicle will be towing a trailer, load from your trailer will be transferred to your vehicle. Consult this manual to determine how this reduces the available cargo and luggage load capacity of your vehicle.”
See Trailer Towing (Except eAssist) on page 9-56 or Trailer Towing (eAssist) on page 9-56
for important information on towing a trailer, towing safety rules, and trailering tips.Example 1
Example 2
1. Vehicle Capacity Weight for Example 1 = 453 kg (1,000 lbs).
2. Subtract Occupant Weight
@ 68 kg (150 lbs) × 2 = 136 kg (300 lbs).
3. Available Occupant and Cargo Weight = 317 kg (700 lbs).
1. Vehicle Capacity Weight for Example 2 = 453 kg (1,000 lbs).
2. Subtract Occupant Weight
@ 68 kg (150 lbs) × 5 = 340 kg (750 lbs).
3. Available Cargo Weight =
113 kg (250 lbs).
Chevrolet Malibu Owner Manual 6081487) - 2014 - CRC - 11/19/13
(GMNA-Localizing-U.S./Canada/Mexico-
Black plate (13,1)
Driving and Operating
9-13
seating positions. The combined weight of the driver, passengers, and cargo should never exceed the vehicle's capacity weight.
Certification Label
Example 3
1. Vehicle Capacity Weight for Example 3 = 453 kg (1,000 lbs).
2. Subtract Occupant Weight
@ 91 kg (200 lbs) × 5 = 453 kg (1,000 lbs).
3. Available Cargo Weight =
0 kg (0 lbs).
Refer to the vehicle's Tire and Loading Information label for specific information about the vehicle's capacity weight and
Label Example
A vehicle-specific Certification label is attached to the vehicle's center pillar (B-pillar). The label tells the gross weight capacity of the vehicle, called the Gross Vehicle Weight Rating (GVWR). The GVWR includes the weight of the vehicle, all occupants,
fuel, and cargo. Never exceed the GVWR for the vehicle, or the Gross Axle Weight Rating (GAWR) for either the front or rear axle. And, if there is a heavy load, it should be spread out. See “Steps for Determining Correct Load Limit” earlier in this section.
{ Warning
Do not load the vehicle any heavier than the Gross Vehicle Weight Rating (GVWR), or either the maximum front or rear Gross Axle Weight Rating (GAWR). This can cause systems to break and change the way the vehicle handles. This could cause loss of control and a crash. Overloading can also shorten the life of the vehicle.
Chevrolet Malibu Owner Manual 6081487) - 2014 - CRC - 11/19/13
(GMNA-Localizing-U.S./Canada/Mexico-
Black plate (14,1)
9-14
Driving and Operating
If you put things inside the vehicle — like suitcases, tools, packages, or anything else — they will go as fast as the vehicle goes. If you have to stop or turn quickly, or if there is a crash, they will keep going.
{ Warning
Things inside the vehicle can strike and injure people in a sudden stop or turn, or in a crash.
. Put things in the cargo
area of the vehicle. In the cargo area, put them as far forward as possible. Try to spread the weight evenly.
(Continued)
Warning (Continued)
. Never stack heavier
things, like suitcases, inside the vehicle so that some of them are above the tops of the seats.
. Do not leave an
unsecured child restraint in the vehicle.
. Secure loose items in the
vehicle.
. Do not leave a seat folded
down unless needed.
Starting and Operating
New Vehicle Break-In
{ Caution
The vehicle does not need an elaborate break-in. But it will perform better in the long run if you follow these guidelines: . Do not drive at any one
constant speed, fast or slow, for the first 805 km (500 mi). Do not make full-throttle starts. Avoid downshifting to brake or slow the vehicle.
. Avoid making hard stops for
the first 322 km (200 mi) or so. During this time the new brake linings are not yet broken in. Hard stops with new linings can mean premature wear and earlier replacement. Follow this
(Continued)
Chevrolet Malibu Owner Manual 6081487) - 2014 - CRC - 11/19/13
(GMNA-Localizing-U.S./Canada/Mexico-
Black plate (15,1)
Caution (Continued)
breaking-in guideline every time you get new brake linings.
Following break-in, engine speed and load can be gradually increased.
Ignition Positions (Keyless Access)
The vehicle may have an electronic keyless ignition with pushbutton start. Pressing the button cycles it through three modes, ACC/ACCESSORY, ON/RUN/START, and Stopping the Engine/OFF.
The transmitter must be in the vehicle for the system to operate. If the pushbutton start is not working, the vehicle may be near a strong radio antenna signal causing interference to the Keyless Access system. See Remote Keyless Entry (RKE) System Operation on page 2-3. To shift out of P (Park), the vehicle must be in ACC/ACCESSORY or ON/RUN and the brake pedal must be applied. Stopping the Engine/LOCK/ OFF (No Indicator Lights): When the vehicle is stopped, press the ENGINE START/STOP button once to turn the engine off. If the vehicle is in P (Park), the ignition will turn off, and Retained Accessory Power (RAP) will remain active. See Retained Accessory Power (RAP) on page 9-23.
Driving and Operating
9-15
If the vehicle is not in P (Park), the ignition will return to ACC/ ACCESSORY and display the message SHIFT TO PARK in the Driver Information Center (DIC). See Transmission Messages on page 5-33. When the vehicle is shifted into P (Park), the ignition system will switch to OFF. Do not turn the engine off when the vehicle is moving. This will cause a loss of power assist in the brake and steering systems and disable the airbags. If the vehicle must be shut off in an emergency: 1. Brake using a firm and steady
pressure. Do not pump the brakes repeatedly. This may deplete power assist, requiring increased brake pedal force.
2. Shift the vehicle to N (Neutral).
This can be done while the vehicle is moving. After shifting to N (Neutral), firmly apply the brakes and steer the vehicle to a safe location.
Chevrolet Malibu Owner Manual 6081487) - 2014 - CRC - 11/19/13
(GMNA-Localizing-U.S./Canada/Mexico-
Black plate (16,1)
9-16
Driving and Operating
3. Come to a complete stop, shift to P (Park), and turn the ignition to OFF. On vehicles with an automatic transmission, the shift lever must be in P (Park) to turn the ignition switch to the OFF position.
4. Set the parking brake. See
Parking Brake on page 9-31.
{ Warning
Turning off the vehicle while moving may cause loss of power assist in the brake and steering systems and disable the airbags. While driving, only shut the vehicle off in an emergency.
If the vehicle cannot be pulled over, and must be shut off while driving, press and hold the ENGINE START/ STOP button for longer than two seconds, or press twice in five seconds.
ACC/ACCESSORY (Amber Indicator Light): This mode allows you to use some electrical accessories when the engine is off. With the ignition off, pressing the button one time without the brake pedal applied will place the ignition system in ACC/ACCESSORY. The ignition will switch from ACC/ ACCESSORY to OFF after five minutes to prevent battery run down. ON/RUN/START (Green Indicator Light): This mode is for driving and starting. With the ignition off, and the brake pedal applied, pressing the button once will place the ignition system in ON/RUN/START. Once engine cranking begins, release the button. Engine cranking will continue until the engine starts. See Starting the Engine on page 9-19. The ignition will then remain in ON/RUN.
Service Only Mode This power mode is available for service and diagnostics, and to verify the proper operation of the malfunction indicator lamp as may be required for emission inspection purposes. With the vehicle off, and the brake pedal not applied, pressing and holding the button for more than five seconds will place the vehicle in Service Only Mode. The instruments and audio systems will operate as they do in ON/RUN, but the vehicle will not be able to be driven. The engine will not start in Service Only Mode. Push the button again to turn the vehicle off.
Chevrolet Malibu Owner Manual 6081487) - 2014 - CRC - 11/19/13
(GMNA-Localizing-U.S./Canada/Mexico-
Black plate (17,1)
Ignition Positions (Key Access)
The ignition switch has four different positions.
{ Caution
Using a tool to force the key to turn in the ignition could cause damage to the switch or break the key. Use the correct key, make sure it is all the way in, and turn it (Continued)
Driving and Operating
9-17
Caution (Continued)
only with your hand. If the key cannot be turned by hand, see your dealer.
The key must be fully extended to start the vehicle. To shift out of P (Park), turn the ignition to ON/RUN and apply the brake pedal. 1 (STOPPING THE ENGINE/LOCK/ OFF): When the vehicle is stopped, turn the ignition switch to LOCK/ OFF to turn the engine off. Retained Accessory Power (RAP) will remain active. See Retained Accessory Power (RAP) on page 9-23. This is the only position from which the key can be removed. This locks the ignition and automatic transmission.
Do not turn the engine off when the vehicle is moving. This will cause a loss of power assist in the brake and steering systems, and disable the airbags. If the vehicle must be shut off in an emergency: 1. Brake using a firm and steady
pressure. Do not pump the brakes repeatedly. This may deplete power assist, requiring increased brake pedal force.
2. Shift the vehicle to N (Neutral).
This can be done while the vehicle is moving. After shifting to N (Neutral), firmly apply the brakes and steer the vehicle to a safe location.
3. Come to a complete stop, shift to P (Park), and turn the ignition to LOCK/OFF. On vehicles with an automatic transmission, the shift lever must be in P (Park) to turn the ignition switch to the LOCK/OFF position.
Chevrolet Malibu Owner Manual 6081487) - 2014 - CRC - 11/19/13
(GMNA-Localizing-U.S./Canada/Mexico-
Black plate (18,1)
9-18
Driving and Operating
4. Set the parking brake. See
Parking Brake on page 9-31.
{ Warning
Turning off the vehicle while moving may cause loss of power assist in the brake and steering systems and disable the airbags. While driving, only shut the vehicle off in an emergency.
If the vehicle cannot be pulled over, and must be shut off while driving, turn the ignition to ACC/ ACCESSORY. 2 (ACC/ACCESSORY): This position provides power to some of the electrical accessories. It unlocks the ignition. To move the key from ACC/ACCESSORY to LOCK/OFF, the shift lever must be in P (Park).
3 (ON/RUN): The ignition switch stays in this position when the engine is running. This position can be used to operate the electrical accessories, including the ventilation fan and 12-volt power outlets, as well as to display some warning and indicator lights. This position can also be used for service and diagnostics, and to verify the proper operation of the malfunction indicator lamp as may be required for emission inspection purposes. The transmission is also unlocked in this position. The battery could be drained if the key is left in the ACC/ACCESSORY or ON/RUN position with the engine off. The vehicle might not restart if the battery is allowed to drain for an extended period of time. 4 (START): This position starts the engine. When the engine starts, release the key. The ignition switch will return to ON/RUN for normal driving.
A warning tone sounds when the driver door is opened when the ignition is still in ACC/ACCESSORY and the key is in the ignition. If the ignition becomes difficult to turn, see Keys on page 2-1. Key Lock Release
Vehicles with an automatic transmission are equipped with an electronic key lock release system. This system is to prevent ignition key removal unless the shift lever is in P (Park).
Chevrolet Malibu Owner Manual 6081487) - 2014 - CRC - 11/19/13
(GMNA-Localizing-U.S./Canada/Mexico-
Black plate (19,1)
The key lock release will not work if the battery is charged less than 9 volts, or uncharged. Try charging or jump starting the battery. See Jump Starting (On-board with eAssist Only) on page 10-91 or Jump Starting (with or without eAssist) on page 10-92. If charging or jump starting the battery does not work, there is a manual key lock release. Locate the hole below the ignition lock. Insert a tool or key into the opening. Locate the lever, and press it toward the driver while removing the key from the ignition.
Starting the Engine Move the shift lever to P (Park) or N (Neutral). The engine will not start in any other position. To restart the engine when the vehicle is already moving, use N (Neutral) only.
{ Caution
Do not try to shift to P (Park) if the vehicle is moving. If you do, you could damage the transmission. Shift to P (Park) only when the vehicle is stopped.
{ Caution
If you add electrical parts or accessories, you could change the way the engine operates. Any resulting damage would not be covered by the vehicle warranty. See Add-On Electrical Equipment on page 9-58.
Driving and Operating
9-19
Starting Procedure 1. With your foot off the accelerator pedal, turn the ignition to START. When the engine starts, let go of the ignition. The idle speed will go down as your engine gets warm. Do not race the engine immediately after starting it. Operate the engine and transmission gently to allow the oil to warm up and lubricate all moving parts. The vehicle has a Computer-Controlled Cranking System. This feature assists in starting the engine and protects components. If the ignition is turned to the START position, and then released when the engine begins cranking, the engine will continue cranking for a few seconds or until the vehicle starts. If the engine does not start and the ignition is held in START for many seconds, cranking will be stopped after 15 seconds to prevent cranking
Chevrolet Malibu Owner Manual 6081487) - 2014 - CRC - 11/19/13
(GMNA-Localizing-U.S./Canada/Mexico-
Black plate (20,1)
9-20
Driving and Operating
motor damage. To prevent gear damage, this system also prevents cranking if the engine is already running. Engine cranking can be stopped by turning the ignition to ACC/ ACCESSORY or LOCK/OFF.
{ Caution
Cranking the engine for long periods of time, by returning the ignition to the START position immediately after cranking has ended, can overheat and damage the cranking motor, and drain the battery. Wait at least 15 seconds between each try, to let the cranking motor cool down.
2.
If the engine does not start after five to 10 seconds, especially in very cold weather (below −18°C or 0°F), it could be flooded with too much gasoline. Try pushing the accelerator pedal all the way to the floor and holding it there as you hold the key in START,
or press the ENGINE START/ STOP button, for up to a maximum of 15 seconds. Wait at least 15 seconds between each try, to allow the cranking motor to cool down. When the engine starts, let go of the key or button, and the accelerator. If the vehicle starts briefly but then stops again, do the same thing. This clears the extra gasoline from the engine. Do not race the engine immediately after starting it. Operate the engine and transmission gently until the oil warms up and lubricates all moving parts.
eAssist Automatic Engine Start/Stop
{ Warning
Exiting the vehicle without first shifting into P (Park) may cause the vehicle to move. You or others may be injured. Because the
(Continued)
Warning (Continued)
vehicle has the automatic engine start/stop feature, the vehicle's engine might seem to be shut off; however, once the brake pedal is released, the engine will start up again. Shift to P (Park) and turn the ignition to LOCK/OFF, before exiting the vehicle.
eAssist vehicles have an automatic engine start/stop feature. After the engine is started and has reached operating temperature, the auto stop feature may cause the engine to turn off when the brakes are applied and the vehicle comes to a complete stop. The vehicle may remain in auto stop for up to two minutes. When the brake is released or the accelerator pedal applied, the engine will restart. The engine will continue to run until the next auto stop.
Chevrolet Malibu Owner Manual 6081487) - 2014 - CRC - 11/19/13
(GMNA-Localizing-U.S./Canada/Mexico-
Black plate (21,1)
Driving and Operating
9-21
AUTO STOP on the tachometer signifies that the engine is in auto stop mode. See Tachometer on page 5-10. When the vehicle is turned off, the tachometer will move to OFF. If the driver door is opened while in auto stop mode, a chime will sound. There are several conditions that may prevent an auto stop or cause an auto start.
The Engine Will Remain Running When:
The engine, transmission, or high voltage battery is not warmed up yet. The outside temperature is less than −20°C (−4°F). The air conditioning or defrost system need the compressor to maintain vehicle comfort. See Dual Automatic Climate Control System on page 8-4. The warmer it is outside, the shorter the time before the engine is restarted to provide cabin
cooling. To maximize fuel economy, use the eco air conditioning mode. The shift lever is in P (Park), N (Neutral), R (Reverse), or M (Manual Mode). The high voltage battery pack charge is low. The hood is not fully closed. . Brake pedal pressure is low.
The malfunction indicator lamp is on; auto stop may be prevented.
. High humidity is detected.
The Engine Will Restart When: The brake pedal is released. The accelerator pedal is applied.
. Shifting out of D (Drive) to any
other gear. The air conditioning or defrost system need the compressor to maintain vehicle comfort. See Dual Automatic Climate Control System on page 8-4. The warmer it is outside, the shorter
the time before the engine is restarted to provide cabin cooling. To maximize fuel economy, use the eco air conditioning mode. The climate control system is turned from off to normal air conditioning or defrost. See Dual Automatic Climate Control System on page 8-4. The engine is required to run for either heater or climate control performance. See Dual Automatic Climate Control System on page 8-4. The high voltage battery pack charge is low and requires recharging.
. Auto stop time is greater than
two minutes. The hood is opened.
Chevrolet Malibu Owner Manual 6081487) - 2014 - CRC - 11/19/13
(GMNA-Localizing-U.S./Canada/Mexico-
Black plate (22,1)
9-22
Driving and Operating
Stop/Start System
{ Warning
Exiting the vehicle without first shifting into P (Park) may cause the vehicle to move. You or others may be injured. Because the vehicle has the auto engine stop/ start feature, the vehicle's engine might seem to be shut off; however, once the brake pedal is released, the engine will start up again. Shift to P (Park) and turn the ignition to LOCK/OFF, before exiting the vehicle.
If equipped with the 2.5L L4 Engine, the vehicle has a fuel saving stop/ start system to shut off the engine to help conserve fuel.
Auto Engine Stop/Start When the brakes are applied and the vehicle is at a complete stop, the engine may turn off. When stopped, the tachometer displays AUTO STOP. See Tachometer on page 5-10. When the brake pedal is released or the accelerator pedal pushed, the engine will restart. Auto Stop may be deactivated if: . A minimum vehicle speed is not
reached. The engine or transmission is not at the required operating temperature. The outside temperature is not in the required operating range. Typically below -10°C (14°F) or above 50°C (122°F). The shift lever is in any gear other than D (Drive). The battery charge is low.
The interior comfort level has not reached the required level for the climate control system or defog settings. Use the eco (green indicator on) air conditioning mode for better efficiency. See Dual Automatic Climate Control System on page 8-4. The Auto Stop time is greater than two minutes.
Engine Heater The engine coolant heater, if available, can help in cold weather conditions at or below −18°C (0°F) for easier starting and better fuel economy during engine warm-up. Plug in the coolant heater at least four hours before starting the vehicle. An internal thermostat in the plug end of the cord will prevent engine coolant heater operation at temperatures above −18°C (0°F).
Chevrolet Malibu Owner Manual 6081487) - 2014 - CRC - 11/19/13
(GMNA-Localizing-U.S./Canada/Mexico-
Black plate (23,1)
To Use the Engine Coolant Heater 1. Turn off the engine. 2. Open the hood and unwrap the
electrical cord.
The electrical cord is on the passenger side of the engine compartment, between the fender and the air cleaner.
3. Plug it into a normal, grounded
110-volt AC outlet.
{ Warning Plugging the cord into an ungrounded outlet could cause an electrical shock. Also, the wrong kind of extension cord could overheat and cause a fire. You could be seriously injured. Plug the cord into a properly grounded three-prong 110-volt AC outlet. If the cord will not reach, use a heavy-duty three-prong extension cord rated for at least 15 amps.
4. Before starting the engine, be
sure to unplug and store the cord as it was before to keep it away from moving engine parts. The length of time the heater should remain plugged in depends on several factors. Ask a dealer in the area where you will be parking the vehicle for the best advice on this.
Driving and Operating
9-23
Retained Accessory Power (RAP) These vehicle accessories can be used for up to 10 minutes after the engine is turned off: . Audio System . Power Windows . Sunroof (if equipped) These features continue to work up to 10 minutes after the ignition is turned to LOCK/OFF. The power windows and sunroof will work until any door is opened. The radio continues to work until the driver door is opened. All these features operate when the key is in ON/RUN or ACC/ ACCESSORY.
Shifting Into Park 1. Hold the brake pedal down and
set the parking brake. See Parking Brake on page 9-31.
Chevrolet Malibu Owner Manual 6081487) - 2014 - CRC - 11/19/13
(GMNA-Localizing-U.S./Canada/Mexico-
Black plate (24,1)
9-24
Driving and Operating
2. Move the shift lever into P (Park)
by holding in the button on the shift lever and pushing the shift lever all the way toward the front of the vehicle.
3. Turn the ignition to LOCK/OFF. 4. Remove the key (if equipped) and take it with you. If you can leave the vehicle with the ignition key in your hand, the vehicle is in P (Park).
Leaving the Vehicle with the Engine Running
{ Warning
It can be dangerous to leave the vehicle with the engine running. It could overheat and catch fire. It is dangerous to get out of the vehicle if the shift lever is not fully in P (Park) with the parking brake firmly set. The vehicle can roll.
(Continued)
Warning (Continued)
Do not leave the vehicle when the engine is running. If you have left the engine running, the vehicle can move suddenly. You or others could be injured. To be sure the vehicle will not move, even when you are on fairly level ground, always set the parking brake and move the shift lever to P (Park). See Shifting Into Park on page 9-23.
If you have to leave the vehicle with the engine running, be sure the vehicle is in P (Park) and the parking brake is firmly set before you leave it. After you have moved the shift lever into P (Park), hold the regular brake pedal down. Then, see if you can move the shift lever away from P (Park) without first pushing the button. If you can, it means that the shift lever was not fully locked in P (Park).
Torque Lock Torque lock is when the weight of the vehicle puts too much force on the parking pawl in the transmission. This happens when parking on a hill and shifting the transmission into P (Park) is not done properly, then it is difficult to shift out of P (Park). To prevent torque lock, set the parking brake and then shift into P (Park). To find out how, see “Shifting Into Park” listed previously. If torque lock does occur, your vehicle may need to be pushed uphill by another vehicle to relieve the parking pawl pressure, so you can shift out of P (Park). If you are towing a trailer and parking on a hill, see Driving Characteristics and Towing Tips on page 9-53.
Chevrolet Malibu Owner Manual 6081487) - 2014 - CRC - 11/19/13
(GMNA-Localizing-U.S./Canada/Mexico-
Black plate (25,1)
Shifting out of Park This vehicle is equipped with an electronic shift lock release system. The shift lock release is designed to: . Prevent ignition key removal (if equipped) unless the shift lever is in P (Park) with the shift lever button fully released.
To shift out of P (Park): 1. Apply the brake pedal. 2. Place the ignition in ON/RUN. 3. Press the shift lever button. 4. Move the shift lever to the
desired position.
If still unable to shift out of P (Park): 1. Fully release the shift lever
. Prevent movement of the shift
button.
lever out of P (Park), unless the ignition is in ON/RUN and the brake pedal is applied.
The shift lock release is always functional except in the case of an uncharged or low voltage (less than 9-volt) battery. If the vehicle has an uncharged battery or a battery with low voltage, try charging or jump starting the battery. See Jump Starting (On-board with eAssist Only) on page 10-91 or Jump Starting (with or without eAssist) on page 10-92.
2. Hold the brake pedal down and
press the shift lever button again.
3. Move the shift lever to the
desired position.
If you are still having a problem shifting, see your dealer. Shift Lock Manual Release If jump starting the vehicle did not work, the shift lock manual release must be used.
Driving and Operating
9-25
To access the shift lock manual release: 1. Apply the parking brake.
2. Release the shift lever trim from
the center console at the rear, then fold upward and turn it to the left.
Chevrolet Malibu Owner Manual 6081487) - 2014 - CRC - 11/19/13
(GMNA-Localizing-U.S./Canada/Mexico-
Black plate (26,1)
9-26
Driving and Operating
Parking over Things That Burn
{ Warning
Things that can burn could touch hot exhaust parts under the vehicle and ignite. Do not park over papers, leaves, dry grass, or other things that can burn.
Engine Exhaust { Warning
Engine exhaust contains carbon monoxide (CO) which cannot be seen or smelled. Exposure to CO can cause unconsciousness and even death. Exhaust may enter the vehicle if:
. The vehicle idles in areas
with poor ventilation (parking garages, tunnels, deep snow that may block underbody airflow or tail pipes).
. The exhaust smells or
sounds strange or different.
. The exhaust system leaks
due to corrosion or damage. . The vehicle exhaust system
has been modified, damaged, or improperly repaired.
(Continued)
3.
4.
Insert a tool into the opening as far as it will go and move the shift lever out of P (Park). If P (Park) is selected again, the shift lever will be locked again. Have the cause of the problem fixed by your dealer. Install the shift lever trim on the console.
Chevrolet Malibu Owner Manual 6081487) - 2014 - CRC - 11/19/13
(GMNA-Localizing-U.S./Canada/Mexico-
Black plate (27,1)
Running the Vehicle While Parked It is better not to park with the engine running. If the vehicle is left with the engine running, follow the proper steps to be sure the vehicle will not move. See Shifting Into Park on page 9-23
and Engine Exhaust on page 9-26. If parking on a hill and pulling a trailer, see Driving Characteristics and Towing Tips on page 9-53.Warning (Continued)
. There are holes or openings
in the vehicle body from damage or aftermarket modifications that are not completely sealed.
If unusual fumes are detected or if it is suspected that exhaust is coming into the vehicle:
. Drive it only with the windows
completely down.
. Have the vehicle repaired
immediately.
Never park the vehicle with the engine running in an enclosed area such as a garage or a building that has no fresh air ventilation.
Driving and Operating
9-27
Automatic Transmission
P (Park): This position locks the front wheels. It is the best position to use when you start the engine because the vehicle cannot move easily.
Chevrolet Malibu Owner Manual 6081487) - 2014 - CRC - 11/19/13
(GMNA-Localizing-U.S./Canada/Mexico-
Black plate (28,1)
9-28
Driving and Operating
{ Warning
It is dangerous to get out of the vehicle if the shift lever is not fully in P (Park) with the parking brake firmly set. The vehicle can roll. Do not leave the vehicle when the engine is running. If you have left the engine running, the vehicle can move suddenly. You or others could be injured. To be sure the vehicle will not move, even when you are on fairly level ground, always set the parking brake and move the shift lever to P (Park). See Shifting Into Park on page 9-23.
Make sure the shift lever is fully in P (Park) before starting the engine. The vehicle has an automatic transmission shift lock control system. You must fully apply the brake pedal then press the shift lever button before you can shift from P (Park) while the ignition key
is in ON/RUN. If you cannot shift out of P (Park), ease pressure on the shift lever and push the shift lever all the way into P (Park) as you maintain brake application. Then move the shift lever into another gear. See Shifting out of Park on page 9-25. R (Reverse): Use this gear to back up.
{ Caution
Shifting to R (Reverse) while the vehicle is moving forward could damage the transmission. The repairs would not be covered by the vehicle warranty. Shift to R (Reverse) only after the vehicle is stopped.
To rock the vehicle back and forth to get out of snow, ice, or sand without damaging the transmission, see If the Vehicle Is Stuck on page 9-9.
N (Neutral): In this position, the engine does not connect with the wheels. To restart the engine when the vehicle is already moving, use N (Neutral) only.
{ Warning
Shifting into a drive gear while the engine is running at high speed is dangerous. Unless your foot is firmly on the brake pedal, the vehicle could move very rapidly. You could lose control and hit people or objects. Do not shift into a drive gear while the engine is running at high speed.
{ Caution Shifting out of P (Park) or N (Neutral) with the engine running at high speed may damage the transmission. The repairs would not be covered by
(Continued)
Chevrolet Malibu Owner Manual 6081487) - 2014 - CRC - 11/19/13
(GMNA-Localizing-U.S./Canada/Mexico-
Black plate (29,1)
Caution (Continued)
the vehicle warranty. Be sure the engine is not running at high speed when shifting the vehicle.
D (Drive): This position is for normal driving. It provides the best fuel economy. If you need more power for passing, and you are: . Accelerating slowly or
maintaining a constant speed, push the accelerator pedal about halfway down.
. Accelerating quickly or passing,
push the accelerator all the way down.
M (Manual Mode): This position allows you to change gears similar to a manual transmission. If the vehicle has this feature, see Manual Mode on page 9-29.
Driving and Operating
9-29
Manual Mode
Driver Shift Control (DSC) To use this feature: 1. Move the shift lever from
D (Drive) rearward to M (Manual). While driving in manual mode, the transmission will remain in the driver selected gear. When coming to a stop in the manual position, the vehicle will automatically shift into 1 (First) gear.
2. Press the + (plus) end of the button on the top of the shift lever to upshift, or push the − (minus) end of the button to downshift.
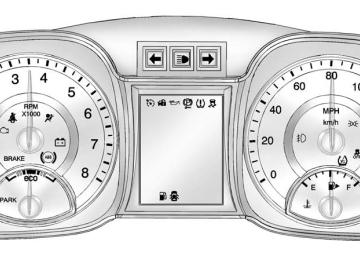
The Driver Information Center (DIC) in the instrument cluster will change from the currently displayed message to the letter “M,” for Manual position, and a number indicating the requested gear.
While using the DSC feature the transmission will have firmer shifting and sportier performance. You can use this for sport driving or when climbing hills to stay in gear longer or to downshift for more power or engine braking. The transmission will only allow you to shift into gears appropriate for the vehicle speed and engine revolutions per minute (rpm):
The transmission will not allow shifting to the next higher gear if the vehicle speed or engine rpm is too low. The transmission will not allow shifting to the next lower gear if the vehicle speed or engine rpm is too high.
Second Gear Start Feature When accelerating the vehicle from a stop in snowy and icy conditions, you may want to shift into 2 (Second) gear. A higher gear allows you to gain more traction on slippery surfaces.
Chevrolet Malibu Owner Manual 6081487) - 2014 - CRC - 11/19/13
(GMNA-Localizing-U.S./Canada/Mexico-
Black plate (30,1)
9-30
Driving and Operating
With the DSC feature, the vehicle can be set to pull away in 2 (Second) gear. 1. Move the shift lever from
D (Drive) to M (Manual Mode).
2. With the vehicle stopped, press
the (+) end of the button to select 2 (Second) gear. The vehicle will start from a stop position in 2 (Second) gear.
3. Once moving, select the desired
drive gear.
Brakes
Antilock Brake System (ABS) This vehicle has ABS, an advanced electronic braking system that helps prevent a braking skid. When the vehicle begins to drive away, ABS checks itself. A momentary motor or clicking noise might be heard while this test is going on, and it might even be noticed that the brake pedal moves a little. This is normal.
If there is a problem with ABS, this warning light stays on. See Antilock Brake System (ABS) Warning Light on page 5-17.
If driving safely on a wet road and it becomes necessary to slam on the brakes and continue braking to avoid a sudden obstacle, a computer senses the wheels are slowing down. If one of the wheels is about to stop rolling, the computer will separately work the brakes at each wheel. ABS can change the brake pressure to each wheel, as required, faster than any driver could. This can help you steer around the obstacle while braking hard. As the brakes are applied, the computer keeps receiving updates on wheel speed and controls braking pressure accordingly. Remember: ABS does not change the time needed to get a foot up to the brake pedal or always decrease stopping distance. If you get too close to the vehicle in front of you, there will not be enough time to apply the brakes if that vehicle
Chevrolet Malibu Owner Manual 6081487) - 2014 - CRC - 11/19/13
(GMNA-Localizing-U.S./Canada/Mexico-
Black plate (31,1)
Driving and Operating
9-31
suddenly slows or stops. Always leave enough room up ahead to stop, even with ABS. Using ABS Do not pump the brakes. Just hold the brake pedal down firmly and let ABS work. You may hear the ABS pump or motor operating and feel the brake pedal pulsate. This is normal. Braking in Emergencies ABS allows you to steer and brake at the same time. In many emergencies, steering can help more than even the very best braking.
Parking Brake
To set the parking brake, hold the brake pedal down and pull up on the parking brake lever. If the ignition is on, the brake system warning light will come on. See Brake System Warning Light on page 5-17.
To release the parking brake, hold the brake pedal down. Pull the parking brake lever up until you can press the release button. Hold the release button in as you move the brake lever all the way down.
{ Caution
Driving with the parking brake on can overheat the brake system and cause premature wear or damage to brake system parts. Make sure that the parking brake is fully released and the brake warning light is off before driving.
Chevrolet Malibu Owner Manual 6081487) - 2014 - CRC - 11/19/13
(GMNA-Localizing-U.S./Canada/Mexico-
Black plate (32,1)
9-32
Driving and Operating
Brake Assist The Brake Assist feature is designed to assist the driver in stopping or decreasing vehicle speed in emergency driving conditions. This feature uses the stability system hydraulic brake control module to supplement the power brake system under conditions where the driver has quickly and forcefully applied the brake pedal in an attempt to quickly stop or slow down the vehicle. The stability system hydraulic brake control module increases brake pressure at each corner of the vehicle until the ABS activates. Minor brake pedal pulsation or pedal movement during this time is normal and the driver should continue to apply the brake pedal as the driving situation dictates The Brake Assist feature will automatically disengage when the brake pedal is released or brake pedal pressure is quickly decreased.
Hill Start Assist (HSA) If equipped, Hill Start Assist (HSA) may be useful when the vehicle is stopped on a grade. This feature is designed to prevent the vehicle from rolling, either forward or rearward, during vehicle drive off. After the driver completely stops and holds the vehicle in a complete standstill on a grade, HSA will be automatically activated. During the transition period between when the driver releases the brake pedal and starts to accelerate to drive off on a grade, HSA holds the braking pressure to ensure that there is no rolling. The brakes will automatically release when the accelerator pedal is applied within the two-second window. It will not activate if the vehicle is in a drive gear and facing downhill or if the vehicle is facing uphill and in R (Reverse).
Ride Control Systems
Traction Control/ Electronic Stability Control
System Operation The vehicle has a Traction Control System (TCS) and StabiliTrak®, an electronic stability control system. These systems help limit wheel slip and assist the driver in maintaining control, especially on slippery road conditions. TCS activates if it senses that any of the drive wheels are spinning or beginning to lose traction. When this happens, TCS applies the brakes to the spinning wheels and reduces engine power to limit wheel spin. StabiliTrak activates when the vehicle senses a difference between the intended path and the direction the vehicle is actually traveling.
Chevrolet Malibu Owner Manual 6081487) - 2014 - CRC - 11/19/13
(GMNA-Localizing-U.S./Canada/Mexico-
Black plate (33,1)
See If the Vehicle Is Stuck on page 9-9 and “Turning the Systems Off and On” later in this section.
The indicator light for both systems is in the instrument cluster. This light will:
Flash when TCS is limiting wheel spin. Flash when StabiliTrak is activated. Turn on and stay on when either system is not working.
Driving and Operating
9-33
If either system fails to turn on or to activate, a message displays in the Driver Information Center (DIC), and d comes on and stays on to indicate that the system is inactive and is not assisting the driver in maintaining control. The vehicle is safe to drive, but driving should be adjusted accordingly. If d comes on and stays on: 1. Stop the vehicle. 2. Turn the engine off and wait
15 seconds.
3. Start the engine. Drive the vehicle. If d comes on and stays on, the vehicle may need more time to diagnose the problem. If the condition persists, see your dealer.
StabiliTrak selectively applies braking pressure to any one of the vehicle wheel brakes to assist the driver in keeping the vehicle on the intended path. If cruise control is being used and traction control or StabiliTrak begins to limit wheel spin, cruise control will disengage. Cruise control may be turned back on when road conditions allow. Both systems come on automatically when the vehicle is started and begins to move. The systems may be heard or felt while they are operating or while performing diagnostic checks. This is normal and does not mean there is a problem with the vehicle. It is recommended to leave both systems on for normal driving conditions, but it may be necessary to turn TCS off if the vehicle gets stuck in sand, mud, ice, or snow.
Chevrolet Malibu Owner Manual 6081487) - 2014 - CRC - 11/19/13
(GMNA-Localizing-U.S./Canada/Mexico-
Black plate (34,1)
9-34
Driving and Operating
Turning the Systems Off and On
{ Caution
Do not repeatedly brake or accelerate heavily when TCS is off. The vehicle driveline could be damaged.
To turn off only TCS, press and release the TCS/StabiliTrak button. The traction off light i displays in the instrument cluster. To turn TCS on again, press and release the TCS/StabiliTrak button. The traction off light i displayed in the instrument cluster will turn off. If TCS is limiting wheel spin when the TCS/StabiliTrak button is pressed, the system will not turn off until the wheels stop spinning.
To turn the system off, press the TCS/StabiliTrak button on the center stack.
To turn off both TCS and StabiliTrak, press and hold the TCS/StabiliTrak button until the traction off light i and StabiliTrak OFF Light g come on and stay on in the instrument cluster. To turn TCS and StabiliTrak on again, press and release the TCS/ StabiliTrak button. The traction off light i and StabiliTrak OFF Light g in the instrument cluster turn off. Adding accessories can affect the vehicle performance. See Accessories and Modifications on page 10-3.
Chevrolet Malibu Owner Manual 6081487) - 2014 - CRC - 11/19/13
(GMNA-Localizing-U.S./Canada/Mexico-
Black plate (35,1)
Driving and Operating
9-35
{ Warning
Cruise control can be dangerous where you cannot drive safely at a steady speed. Do not use the cruise control on winding roads or in heavy traffic. Cruise control can be dangerous on slippery roads. On such roads, fast changes in tire traction can cause excessive wheel slip, and you could lose control. Do not use cruise control on slippery roads.
Cruise Control The cruise control lets the vehicle maintain a speed of about 40 km/h (25 mph) or more without keeping your foot on the accelerator. Cruise control does not work at speeds below 40 km/h (25 mph). With the Traction Control System (TCS) or StabiliTrak system, the system may begin to limit wheel spin while you are using cruise control. If this happens, the cruise control will automatically disengage. See Traction Control/Electronic Stability Control on page 9-32. If a collision alert occurs when cruise control is activated, cruise control is disengaged. See Forward Collision Alert (FCA) System on page 9-37. When road conditions allow you to safely use it again, the cruise control can be turned back on. If the brakes are applied, the cruise control shuts off.
1 (On/Off): Press to turn the cruise control system on and off. * (Cancel): Press to disengage cruise control without erasing the set speed from memory. RES/+ (Resume/Accelerate): Move the thumbwheel up briefly to make the vehicle resume to a previously set speed or hold upward to accelerate. If cruise control is already active, use to increase vehicle speed.
Chevrolet Malibu Owner Manual 6081487) - 2014 - CRC - 11/19/13
(GMNA-Localizing-U.S./Canada/Mexico-
Black plate (36,1)
9-36
Driving and Operating
SET/− (Set/Coast): Move the thumbwheel down briefly to set the speed and activate cruise control. If cruise control is already active, use to decrease speed.
Setting Cruise Control If the cruise button is on when not in use, it could get bumped and go into cruise when not desired. Keep the cruise control button off when cruise is not being used. To set a speed: 1. Press 1 to turn cruise control on. A white indicator light turns on in the instrument cluster. 2. Get up to the speed desired. 3. Move the thumbwheel down toward SET/− and release it. The indicator turns green in the instrument cluster and the desired set speed briefly appears.
4. Remove foot from the
accelerator.
Resuming a Set Speed If the cruise control is set at a desired speed and then the brakes are applied, the cruise control is disengaged without erasing the set speed from memory. Once the vehicle speed is about 40 km/h (25 mph) or greater, move the thumbwheel up toward RES/+ briefly and then release it. The vehicle returns to the previously set speed.
Increasing Speed While Using Cruise Control If the cruise control system is already activated: . Move the thumbwheel up toward
RES/+ and hold it until the vehicle accelerates to the desired speed, then release it. To increase the speed in small increments, move the thumbwheel up toward RES/+ briefly and then release it. Each
time this is done, the vehicle goes about 1.6 km/h (1 mph) faster.
Reducing Speed While Using Cruise Control If the cruise control system is already activated: . Move the thumbwheel toward
SET/− and hold until the desired lower speed is reached, then release it. To decrease the vehicle speed in small increments, move the thumbwheel toward SET/− briefly. Each time this is done, the vehicle goes about 1.6 km/h (1 mph) slower.
Passing Another Vehicle While Using Cruise Control Use the accelerator pedal to increase the vehicle speed. When you take your foot off the pedal, the vehicle slows down to the previously set cruise control speed.
Chevrolet Malibu Owner Manual 6081487) - 2014 - CRC - 11/19/13
(GMNA-Localizing-U.S./Canada/Mexico-
Black plate (37,1)
Driving and Operating
9-37
While pressing the accelerator pedal or shortly following the release to override cruise control, briefly moving the thumbwheel toward SET– will result in cruise control set to the current vehicle speed.
Using Cruise Control on Hills How well the cruise control works on hills depends upon the vehicle speed, load, and the steepness of the hills. When going up steep hills, you might have to step on the accelerator pedal to maintain the vehicle speed. When going downhill, you might have to brake or shift to a lower gear to maintain the vehicle speed. When the brakes are applied the cruise control is disengaged.
Ending Cruise Control There are three ways to end cruise control: . Step lightly on the brake pedal; when cruise control disengages, the indicator light will not be lit.
. Press *. . Press 1 to turn the cruise
control system off completely.
Erasing Speed Memory The cruise control set speed is erased from memory if 1 is pressed or if the vehicle is turned off.
Driver Assistance Systems
Forward Collision Alert (FCA) System If equipped, the FCA system may help to avoid or reduce the harm caused by front-end crashes. FCA provides a flashing red alert on the windshield, and rapidly beeps when approaching a vehicle directly ahead too quickly. FCA also lights an amber visual alert if following another vehicle much too closely. FCA detects vehicles within a distance of approximately 60 m (197 ft) and operates at speeds above 40 km/h (25 mph).
Chevrolet Malibu Owner Manual 6081487) - 2014 - CRC - 11/19/13
(GMNA-Localizing-U.S./Canada/Mexico-
Black plate (38,1)
9-38
Driving and Operating
{ Warning
Detecting the Vehicle Ahead
{ Warning
FCA is a warning system and does not apply the brakes. When approaching a slower-moving or stopped vehicle ahead too rapidly, or when following a vehicle too closely, FCA may not provide a warning with enough time to help avoid a crash. FCA does not warn of pedestrians, animals, signs, guardrails, bridges, construction barrels, or other objects. Be ready to take action and apply the brakes. For more information, see Defensive Driving on page 9-3.
FCA can be disabled with the FCA steering wheel control.
FCA does not provide a warning to help avoid a crash, unless it detects a vehicle. FCA may not detect a vehicle ahead if the FCA sensor is blocked by dirt, snow, or ice, or if the windshield is damaged. It may also not detect a vehicle on winding or hilly roads, or in conditions that can limit visibility such as fog, rain, or snow, or if the headlamps or windshield are not cleaned or in proper condition. Keep the windshield, headlamps, and FCA sensors clean and in good repair.
FCA warnings will not occur unless the FCA system detects a vehicle ahead. When a vehicle is detected, the vehicle-ahead indicator will display green. Vehicles may not be detected on curves, highway exit ramps, or hills; or due to poor visibility. FCA will not detect another vehicle ahead until it is completely in the driving lane.
Chevrolet Malibu Owner Manual 6081487) - 2014 - CRC - 11/19/13
(GMNA-Localizing-U.S./Canada/Mexico-
Black plate (39,1)
Collision Alert
Tailgating Alert
When your vehicle approaches another detected vehicle too rapidly, the red FCA display will be lit and flash on the windshield. Also, eight rapid high-pitched beeps will sound from the front. When this Collision Alert occurs, the brake system may prepare for driver braking to occur more rapidly which can cause a brief, mild deceleration. Continue to apply the brake pedal as the driving situation dictates.
The vehicle-ahead indicator will display amber when you are following a detected vehicle ahead much too closely. Selecting the Alert Timing The Collision Alert control is on the steering wheel. Press [ to set the FCA timing to far, medium, near, or off. The first button press shows the current control setting on the DIC. Additional button presses will change this setting. The chosen setting will remain until it is changed and will affect the timing of both the Collision Alert and the Tailgating
Driving and Operating
9-39
Alert features. The timing of both alerts will vary based on vehicle speed. The faster the vehicle speed, the farther away the alert will occur. Consider traffic and weather conditions when selecting the alert timing. The range of selectable alert timing may not be appropriate for all drivers and driving conditions. Unnecessary Alerts FCA may provide unnecessary alerts to turning vehicles, vehicles in other lanes, objects that are not vehicles, or shadows. These alerts are normal operation and the vehicle does not need service. Cleaning the System If the FCA system does not seem to operate properly, cleaning the outside of the windshield in front of the camera sensor may correct the issue.