- 1997 Chevrolet Corvette Owners Manuals
- Chevrolet Corvette Owners Manuals
- 2001 Chevrolet Corvette Owners Manuals
- Chevrolet Corvette Owners Manuals
- 2015 Chevrolet Corvette Owners Manuals
- Chevrolet Corvette Owners Manuals
- 1993 Chevrolet Corvette Owners Manuals
- Chevrolet Corvette Owners Manuals
- 2006 Chevrolet Corvette Owners Manuals
- Chevrolet Corvette Owners Manuals
- 1994 Chevrolet Corvette Owners Manuals
- Chevrolet Corvette Owners Manuals
- 2013 Chevrolet Corvette Owners Manuals
- Chevrolet Corvette Owners Manuals
- 1999 Chevrolet Corvette Owners Manuals
- Chevrolet Corvette Owners Manuals
- 2011 Chevrolet Corvette Owners Manuals
- Chevrolet Corvette Owners Manuals
- 2012 Chevrolet Corvette Owners Manuals
- Chevrolet Corvette Owners Manuals
- 2016 Chevrolet Corvette Owners Manuals
- Chevrolet Corvette Owners Manuals
- 2005 Chevrolet Corvette Owners Manuals
- Chevrolet Corvette Owners Manuals
- 2004 Chevrolet Corvette Owners Manuals
- Chevrolet Corvette Owners Manuals
- 2014 Chevrolet Corvette Owners Manuals
- Chevrolet Corvette Owners Manuals
- 2009 Chevrolet Corvette Owners Manuals
- Chevrolet Corvette Owners Manuals
- 1996 Chevrolet Corvette Owners Manuals
- Chevrolet Corvette Owners Manuals
- 2002 Chevrolet Corvette Owners Manuals
- Chevrolet Corvette Owners Manuals
- 2000 Chevrolet Corvette Owners Manuals
- Chevrolet Corvette Owners Manuals
- 2010 Chevrolet Corvette Owners Manuals
- Chevrolet Corvette Owners Manuals
- 2007 Chevrolet Corvette Owners Manuals
- Chevrolet Corvette Owners Manuals
- 2008 Chevrolet Corvette Owners Manuals
- Chevrolet Corvette Owners Manuals
- 2003 Chevrolet Corvette Owners Manuals
- Chevrolet Corvette Owners Manuals
- 1995 Chevrolet Corvette Owners Manuals
- Chevrolet Corvette Owners Manuals
- 1998 Chevrolet Corvette Owners Manuals
- Chevrolet Corvette Owners Manuals
- Download PDF Manual
-
161 km/h (100 mph). Into 3 (Third) gear over 131 km/h (93 mph). Into 2 (Second) gear over 88 km/h (62 mph). Into 1 (First) gear over 55 km/h (39 mph).
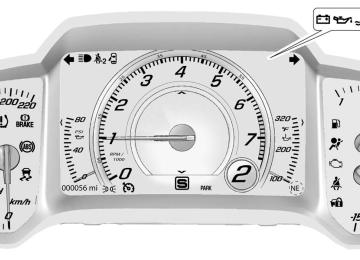
If an upshift is not requested as the engine speed approaches fuel shutoff rpm, the engine speed will be limited to protect the engine. See Tachometer 0 101. Gear Shifting Light
The gear shift light illuminates in the instrument cluster when a gear upshift is recommended for best fuel economy or performance, depending on the drivers input.
Chevrolet Corvette Owner Manual (GMNA-Localizing-U.S./Canada/Mexico- 9085364) - 2016 - crc - 9/15/15
Manual Transmission
To operate: 1 : Press the clutch pedal and shift into 1 (First). Then slowly let up on the clutch pedal as the accelerator pedal is pressed. This can be done if the vehicle is going less than 64 km/h (40 mph). If the vehicle is at a complete stop and it is hard to shift into 1 (First), put the shift lever in Neutral and let up on the clutch. Then press the clutch pedal back down and shift into 1 (First).
2 : Press the clutch pedal while letting up on the accelerator pedal and shift into 2 (Second). Then, slowly let up on the clutch pedal as the accelerator pedal is pressed. 3, 4, 5, 6, and 7 : Shift into 3 (Third), 4 (Fourth), 5 (Fifth), 6 (Sixth), and 7 (Seventh) the same way as for 2 (Second). To stop, let up on the accelerator pedal and press the brake pedal. Just before the vehicle stops, press the clutch pedal and the brake pedal, and shift to Neutral. Neutral : Use to start or idle the engine. Neutral is the center position of the shift pattern. R : To back up, push the clutch pedal and shift into R (Reverse). Additional pressure may be needed to move the lever past 5 (Fifth) and 6 (Sixth) into R (Reverse). Let up on the clutch pedal slowly while pressing the accelerator pedal.
Driving and Operating
187
The vehicle can be safely shifted into R (Reverse) while the vehicle is moving less than 5 km/h (3 mph). If the vehicle is going faster than that, R (Reverse) is locked out. Shift Speeds Use the following shift speeds, shown in km/h (mph), for the best fuel economy.
1 to 4
4 to 5
5 to 6
6 to 727 (17) 40 (25) 64 (40) 72 (45)
Caution
When shifting gears, do not move the shift lever around unnecessarily. This may damage the transmission. Shift directly into the next gear.
1–4 Shift Message When the DIC displays this message, the vehicle can only be shifted from 1 (First) to 4 (Fourth).
Chevrolet Corvette Owner Manual (GMNA-Localizing-U.S./Canada/Mexico- 9085364) - 2016 - crc - 9/15/15
188
Driving and Operating
See Transmission Messages 0 129. Downshifting Do not downshift into the gear at a speed greater than shown:
1 (First)
2 (Second)
3 (Third)
4 (Fourth)
72 km/h (45 mph) 107 km/h (67 mph)
160 km/h (100 mph) 233 km/h (145 mph)
Caution
When downshifting, if more than one gear is skipped, or the engine is racing when the clutch pedal is released, the engine, clutch, driveshaft or transmission could be damaged.
If the engine speed drops below 900 rpm, or if the engine is not running smoothly, downshift to the next lower gear. It may be necessary to downshift two or more gears.
The transmission has a spring that centers the shift lever near 3 (Third) and 4 (Fourth). This spring helps to know what gear the shift lever is in when shifting. Be careful when shifting from 1 (First) to 2 (Second) or downshifting from 7 (Seventh) to 6 (Sixth). The spring will try to pull the shift lever toward 4 (Fourth) and 3 (Third). Move the lever into 2 (Second) or 6 (Sixth) and do not let the shift lever move in the direction of the pulling, or it could shift from 1 (First) to 4 (Fourth) or from 7 (Seventh) to 4 (Fourth). If the vehicle is not upshifted as the engine speed approaches fuel shutoff rpm, the engine speed will be limited to protect the engine. See Tachometer 0 101.
Active Rev Match Vehicles equipped with a manual transmission have Active Rev Match (ARM). ARM aids in smoother shifting by matching the engine speed to the next selected gear. By monitoring shift lever and clutch operation, ARM adjusts engine
speed to match a calibrated value based on gear selection. On upshifts and downshifts, engine speed will be increased and decreased to match vehicle road speed and transmission gear position. ARM is maintained for a few seconds between shifts, then deactivates if the shift is not completed.
The system is activated and deactivated by pressing either of the paddles marked REV MATCH on the steering wheel. The system must be activated with each new ignition cycle.
Chevrolet Corvette Owner Manual (GMNA-Localizing-U.S./Canada/Mexico- 9085364) - 2016 - crc - 9/15/15
ARM will also: . Be active above 14 km/h (9 mph).
. Match engine speed up to
5400 rpm.
. Not operate when the
accelerator pedal is applied.
. Be disabled when the coolant
temperature is below 0 °C (32 °F).
A gear indicator in the instrument cluster displays the current gear selected: . When ARM is activated, the
gear number is amber.
. When ARM is deactivated, the
gear number is white.
. A white dash indicates that
service is required. ARM will be disabled, and the malfunction indicator lamp will be on. See Malfunction Indicator Lamp (Check Engine Light) 0 106. The clutch and manual transmission will continue to operate normally.
Driving and Operating
189
Brakes
Antilock Brake System (ABS) This vehicle has ABS, an advanced electronic braking system that helps prevent a braking skid. When the vehicle begins to drive away, ABS checks itself. A momentary motor or clicking noise might be heard while this test is going on, and it might even be noticed that the brake pedal moves a little. This is normal.
If there is a problem with ABS, this warning light stays on. See Antilock Brake System (ABS) Warning Light 0 109.
Chevrolet Corvette Owner Manual (GMNA-Localizing-U.S./Canada/Mexico- 9085364) - 2016 - crc - 9/15/15
190
Driving and Operating
If driving safely on a wet road and it becomes necessary to slam on the brakes and continue braking to avoid a sudden obstacle, a computer senses the wheels are slowing down. If one of the wheels is about to stop rolling, the computer will separately work the brakes at each wheel. ABS can change the brake pressure to each wheel, as required, faster than any driver could. This can help you steer around the obstacle while braking hard. As the brakes are applied, the computer keeps receiving updates on wheel speed and controls braking pressure accordingly. Remember: ABS does not change the time needed to get a foot up to the brake pedal or always decrease stopping distance. If you get too close to the vehicle in front of you, there will not be enough time to apply the brakes if that vehicle suddenly slows or stops. Always leave enough room up ahead to stop, even with ABS.
Using ABS Do not pump the brakes. Just hold the brake pedal down firmly and let ABS work. You may hear the ABS pump or motor operating and feel the brake pedal pulsate. This is normal. Braking in Emergencies ABS allows you to steer and brake at the same time. In many emergencies, steering can help more than even the very best braking.
Electric Parking Brake
The vehicle has an Electric Parking Brake (EPB). The switch is on the center console. The EPB can always be activated, even if the ignition is off. To prevent draining the battery, avoid repeated cycles of the EPB when the engine is not running. The system has a red parking brake status light and an amber parking brake warning light. See Electric Parking Brake Light 0 108 and Service Electric Parking Brake Light 0 109. There are also parking brake-related Driver Information Center (DIC) messages. See Brake System Messages 0 120. In case of insufficient electrical power, the EPB cannot be applied or released. Before leaving the vehicle, check the red parking brake status light to ensure that the parking brake is applied. EPB Apply To apply the EPB: 1. Be sure the vehicle is at a
complete stop.
Chevrolet Corvette Owner Manual (GMNA-Localizing-U.S./Canada/Mexico- 9085364) - 2016 - crc - 9/15/15
2. Lift up the EPB switch
momentarily.
The red parking brake status light will flash and then stay on once the EPB is fully applied. If the red parking brake status light flashes continuously, then the EPB is only partially applied or there is a problem with the EPB. A DIC message will display. Release the EPB and try to apply it again. If the light does not come on, or keeps flashing, have the vehicle serviced. Do not drive the vehicle if the red parking brake status light is flashing. See your dealer. See Electric Parking Brake Light 0 108. If the amber parking brake warning light is on, lift up on the EPB switch and hold it up. Continue to hold the switch until the red parking brake status light remains on. If the amber parking brake warning light remains on, see your dealer. If the EPB is applied while the vehicle is moving, the vehicle will decelerate as long as the switch is
held up. If the switch is held up until the vehicle comes to a stop, the EPB will remain applied. The vehicle may automatically apply the EPB in some situations when the vehicle is not moving. This is normal, and is done to periodically check the correct operation of the EPB system. If the EPB fails to apply, the rear wheels should be blocked to prevent vehicle movement. EPB Release To release the EPB: 1. Place the ignition in the ACC/
ACCESSORY or ON/RUN/ START position.
2. Apply and hold the brake
pedal.
3. Push down momentarily on the
EPB switch.
The EPB is released when the red parking brake status light is off. If the amber parking brake warning light is on, release the EPB by pushing down on the EPB switch
Driving and Operating
191
and holding it down. Continue to hold the switch until the red parking brake status light is off. If either light stays on after release is attempted, see your dealer.
Caution
Driving with the parking brake on can overheat the brake system and cause premature wear or damage to brake system parts. Make sure that the parking brake is fully released and the brake warning light is off before driving.
Automatic EPB Release The EPB will automatically release if the vehicle is running, placed into gear, and an attempt is made to drive away. Avoid rapid acceleration when the EPB is applied, to preserve parking brake lining life. The EPB can also be used to prevent roll back for vehicles with a manual transmission taking off on a hill. When no roll back is desired, an applied EPB will allow both feet to be used for the clutch and
Chevrolet Corvette Owner Manual (GMNA-Localizing-U.S./Canada/Mexico- 9085364) - 2016 - crc - 9/15/15
192
Driving and Operating
accelerator pedals in preparation for starting the vehicle moving in the intended direction. In this case, there is no need to push the switch to release the EPB.
Brake Assist The Brake Assist feature is designed to assist the driver in stopping or decreasing vehicle speed in emergency driving conditions. This feature uses the stability system hydraulic brake control module to supplement the power brake system under conditions where the driver has quickly and forcefully applied the brake pedal in an attempt to quickly stop or slow down the vehicle. The stability system hydraulic brake control module increases brake pressure at each corner of the vehicle until the ABS activates.
Minor brake pedal pulsation or pedal movement during this time is normal and the driver should continue to apply the brake pedal as the driving situation dictates. The Brake Assist feature will automatically disengage when the brake pedal is released or brake pedal pressure is quickly decreased.
Hill Start Assist (HSA) If equipped, HSA may automatically activate when the vehicle is stopped on a grade. This feature is designed to prevent the vehicle from rolling, either forward or rearward, during vehicle drive off. During the transition from releasing the brake pedal to accelerating to drive off on a grade, HSA holds the braking pressure to prevent rolling. HSA will not activate if the vehicle is in a drive gear and facing downhill or if the vehicle is facing uphill and in R (Reverse).
Ride Control Systems
Traction Control/ Electronic Stability Control The vehicle has a Traction Control System (TCS) and a StabiliTrak system. These systems help limit wheel spin and assist the driver in maintaining control, especially on slippery road conditions. TCS activates if it senses that the rear wheels are spinning too much or are beginning to lose traction. When this happens, TCS applies the brakes to the spinning wheel and reduces engine power (by closing the throttle and managing engine spark) to limit wheel spin. StabiliTrak activates when the vehicle senses a difference between the intended path and the direction the vehicle is actually traveling. StabiliTrak selectively applies braking pressure to any one of the vehicle wheel brakes to assist the driver in keeping the vehicle on the intended path.
Chevrolet Corvette Owner Manual (GMNA-Localizing-U.S./Canada/Mexico- 9085364) - 2016 - crc - 9/15/15
If cruise control is being used when TCS begins to limit wheel spin, the cruise control will automatically disengage. Cruise control may be reengaged when road conditions allow. See Cruise Control 0 202. Both systems come on automatically when the vehicle is started and begins to move. The systems may be heard or felt while they are operating or while performing diagnostic checks. This is normal and does not mean there is a problem with the vehicle. It is recommended to leave both systems on for normal driving conditions, but it may be necessary to turn TCS off if the vehicle gets stuck in sand, mud, ice, or snow. See If the Vehicle Is Stuck 0 170
and “Turning the Systems Off and On” later in this section.The indicator light for both systems is in the instrument cluster. This light will: . Flash when TCS is limiting
wheel spin.
. Flash when StabiliTrak is
activated.
. Turn on and stay on when either
system is not working.
If either system fails to turn on or to activate, a message displays in the Driver Information Center (DIC), and d comes on and stays on to indicate that the system is inactive and is not assisting the driver in maintaining control. The vehicle is safe to drive, but driving should be adjusted accordingly. If d comes on and stays on: 1. Stop the vehicle. 2. Turn the engine off and wait
15 seconds.
3. Start the engine.
Driving and Operating
193
Drive the vehicle. If d comes on and stays on, the vehicle may need more time to diagnose the problem. If the condition persists, see your dealer. Turning the Systems Off and On
The TCS/StabiliTrak button is on the center console.
Chevrolet Corvette Owner Manual (GMNA-Localizing-U.S./Canada/Mexico- 9085364) - 2016 - crc - 9/15/15
194
Driving and Operating
Caution
Do not repeatedly brake or accelerate heavily when TCS is off. The vehicle driveline could be damaged.
To turn off only TCS, press and release the g button. The Traction Off light i illuminates in the instrument cluster. To turn TCS on again, press and release the g button. The Traction Off light i displayed in the instrument cluster will turn off. If TCS is limiting wheel spin when the g button is pressed, the system will not turn off until the wheels stop spinning. To turn off both TCS and StabiliTrak, press and hold the g button until the Traction Off light i and StabiliTrak OFF light g illuminate and stay on in the instrument cluster.
To turn TCS and StabiliTrak on again, press and release the g button. The Traction Off light i and StabiliTrak OFF light g in the instrument cluster turn off. If the Tire Pressure Monitor System (TPMS) system is malfunctioning and the DIC displays SERVICE TIRE MONITOR SYSTEM, StabiliTrak will be affected as follows: . StabiliTrak cannot be turned off
by the driver. If StabiliTrak is off, it will be turned on automatically.
. Competitive Driving Mode or
Performance Traction Management is unavailable.
. StabiliTrak will feel different in
aiding and maintaining directional control.
Adding accessories can affect the vehicle performance. See Accessories and Modifications 0 213.
Driver Mode Control
The Driver Mode Selector knob is on the console behind the shift lever. There are five modes for different driving conditions: Weather, Eco, Tour, Sport, and Track. The outer ring turns to change the modes, which display in the instrument cluster.
Chevrolet Corvette Owner Manual (GMNA-Localizing-U.S./Canada/Mexico- 9085364) - 2016 - crc - 9/15/15
Driving and Operating
195
There are 12 attributes that vary by mode shown below. Not all vehicles have all features, depending on the vehicle options.
Press the button in the center of the knob for Stability Control and Traction Control, or if the vehicle is in Track mode with Performance Traction Management (PTM). See Traction Control/Electronic Stability Control 0 192 or the information on PTM in Competitive Driving Mode 0 198. When PTM is active, the outer ring will change the PTM mode and the Driver mode will display in the instrument cluster. Each mode is configured for use in different driving conditions. Use: . Weather mode for rain
and snow.
. Eco mode to improve fuel
economy.
. Tour mode for comfortable
normal driving.
. Sport mode for spirited on road
driving.
. Track mode for track use.
Chevrolet Corvette Owner Manual (GMNA-Localizing-U.S./Canada/Mexico- 9085364) - 2016 - crc - 9/15/15
196
Driving and Operating
Modes:
WEATHER
ECO
Cluster Display Throttle Progression Trans Shift Mode (if equipped) Active Fuel Management Exhaust Mode Steering Stability Control
Tour
Weather Normal Normal
Eco
Comfort Normal
Tour
Normal Normal
Eco Eco
Comfort Normal
TOUR Default
Tour
Normal Normal Normal
Tour
Comfort Normal
SPORT
TRACK
Sport Sport Sport Normal Sport Sport Normal
Track Track Track Normal Track Track
Comp Mode
Avail
Electronic Limited Slip (if equipped)
Mode 1
Mode 1
Mode 1
Mode 2
Modes 2
Magnetic Ride (if equipped) Launch Control Traction Control Performance Traction or Competitive Driving Mode (if equipped)
Tour NA
Tour NA
Tour NA
Sport NA
& 3
TrackAvailable
Weather
Normal
Normal
Normal
Track
Off
Off
Off
Off
Available
Driver Mode Selector Attributes Affected The Gauge Cluster Display is configured for each mode when linked (default):
. Tour: Modern theme which
features displays for audio and navigation.
. Sport: Classic easy to read
Sports Car gauges.
. Track: Gauges design based on Corvette Racing display with lap timer.
Chevrolet Corvette Owner Manual (GMNA-Localizing-U.S./Canada/Mexico- 9085364) - 2016 - crc - 9/15/15
Throttle Progression Adjusts throttle sensitivity by selecting how quick or slow the throttle reacts to input.
Transmission Shift Mode − Paddle Shift Automatic . Adjusts to either a smoother or
firmer shift.
. Sport – Performance Algorithm
Liftfoot (PAL) recognizes aggressive throttle maneuvers and holds lower gears for greater engine braking and enhanced vehicle control when not using paddles. (Available in Sport or Track mode.)
. Track – Performance Algorithm
Shift (PAS) recognizes aggressive cornering, heavy braking, and high acceleration to select and hold lower gears when not using paddles.
Active Fuel Management (engine cylinder shuts off) 4-Cylinder Mode . Normal with automatic
transmission: The engine uses 8-cylinder mode when accelerating, but changes to 4-cylinder mode when coasting.
. With manual transmission:
Active Fuel Management only active in Eco mode.
. Off in Manual mode with
automatic transmission unless in Eco mode.
. Eco keeps the engine in
4-cylinder mode unless heavy acceleration is needed.
Exhaust (variable mode exhaust system) Changes when the variable exhaust valves open.
Steering (Assist Effort) Adjusts from a lighter steering feel to reduced assist for more steering feel.
Driving and Operating
197
Magnetic Ride Control (if equipped) Adjusts the shock dampening firmness based on driving conditions to improve comfort and performance.
Launch Control Available only in Track mode for maximum “off–the–line” acceleration when in Competitive or PTM modes.
Stability Control . Competitive Driving Mode allows
less computer control to permit some slide and drift and is selected with the g button – only available in Track mode.
. StabiliTrak can be turned off by
pressing and holding the g button for 10 seconds.
PTM (Performance Traction Management) (if equipped) . Available in Track mode. . There are five selectable
settings if Competitive Driving Mode is activated.
Chevrolet Corvette Owner Manual (GMNA-Localizing-U.S./Canada/Mexico- 9085364) - 2016 - crc - 9/15/15
198
Driving and Operating
Competitive Driving Mode If equipped, Competitive Driving Mode, Performance Traction Management, and Launch Control are systems designed to allow increased performance while accelerating and/or cornering. This is accomplished by regulating and optimizing the engine, brakes, and suspension performance. These modes are for use at a closed course race track and are not intended for use on public roads. They will not compensate for driver inexperience or lack of familiarity with the race track. Drivers who prefer to allow the system to have more control of the engine, brake, and suspension are advised to turn the normal traction control and StabiliTrak systems on.
Caution
Attempting to shift when the drive wheels are spinning and do not have traction may cause damage to the transmission. Damage
(Continued)
Caution (Continued)
caused by misuse of the vehicle is not covered by the vehicle warranty. Do not attempt to shift when the drive wheels do not have traction.
Competitive Driving Mode (Except Z51 and Z06 with Magnetic Ride Control) Competitive Driving Mode allows full engine power while StabiliTrak helps maintain directional control of the vehicle by selective brake application. In this mode, TCS is off and Launch Control is available. Adjust your driving style to account for the available engine power. See “Launch Control” later in this section.
These lights are on when the vehicle is in the Competitive Driving Mode.
In order to select this optional handling mode, the vehicle mode must be Track. Then quickly press the TCS/StabiliTrak g button on the center console two times. STABILITRAK COMPETITIVE
Chevrolet Corvette Owner Manual (GMNA-Localizing-U.S./Canada/Mexico- 9085364) - 2016 - crc - 9/15/15
To select this optional handling mode, the vehicle mode must be Track. Then quickly press the TCS/ StabiliTrak g button on the center console two times. PERF TRAC 1 - WET ACTIVE HANDLING ON displays in the DIC. To experience the performance benefit of this system, after entering a curve and at the point where normal acceleration occurs, fully push the accelerator pedal. The PTM system will modify the level of engine power for a smooth and consistent corner exit.
MODE displays in the Driver Information Center (DIC). See Ride Control System Messages 0 125. When the g button is pressed again, the traction off light i and StabiliTrak OFF light g will go out. Performance Traction Management (Z51 and Z06 with Magnetic Ride Control) Performance Traction Management (PTM) integrates the Traction Control, StabiliTrak, and Magnetic Ride Control systems to provide improved and consistent performance when cornering. The amount of available engine power is based on the mode selected, track conditions, driver skill, and the radius of each corner.
This light is on when the vehicle is in the PTM mode.
Driving and Operating
199
The PTM system contains five modes. These modes are selected by turning the Selective Ride Control/Performance Traction Management MODE SELECT knob on the center console. Scroll up or down through modes 1–5 by turning the MODE SELECT knob to the right or left. The following is a DIC display description and the recommended usage of each mode: PERF TRAC 1 – WET ACTIVE HANDLING ON Intended for all driver skill levels. . Wet or damp conditions only —
not intended for use in heavy rain or standing water.
. StabiliTrak is on and engine power is reduced based on conditions.
PERF TRAC 2 – DRY ACTIVE HANDLING ON . For use by less experienced
drivers or while learning a new track.
Chevrolet Corvette Owner Manual (GMNA-Localizing-U.S./Canada/Mexico- 9085364) - 2016 - crc - 9/15/15
200
Driving and Operating
. Dry conditions only. . StabiliTrak is on and engine
power is slightly reduced. PERF TRAC 3 – SPORT ACTIVE HANDLING ON . For use by drivers who are
familiar with the track.
. Dry conditions only. . Requires more driving skill than
mode 2.
. StabiliTrak is on and more
engine power is available than in mode 2.
PERF TRAC 4 – SPORT ACTIVE HANDLING OFF . For use by drivers who are
familiar with the track.
. Dry conditions only. . Requires more driving skill than
modes 2 or 3.
. StabiliTrak is off and available engine power is the same as mode 3.
PERF TRAC 5 – RACE ACTIVE HANDLING OFF . For use by experienced drivers who are familiar with the track.
. Dry conditions only. . Requires more driving skill than
in other modes.
. StabiliTrak is off and engine
power is available for maximum cornering speed.
Press and release the TCS/ StabiliTrak g button to turn off PTM and return to the traction control and StabiliTrak systems. The traction off light i and StabiliTrak OFF light g will go out. Launch Control (Track Mode Only) A Launch Control feature is available, within Competitive Driving Mode (except Z51 and Z06 with Magnetic Ride Control) or Performance Traction Management (Z51 and Z06 with Magnetic Ride Control), on all vehicles to allow the driver to achieve high levels of
vehicle acceleration in a straight line. Launch Control is a form of traction control that manages tire spin while launching the vehicle. This feature is intended for use during closed course race events where consistent zero to 60 and quarter mile times are desirable. Launch Control is only available when the following criteria are met: . Competitive Driving Mode is
selected (except Z51 and Z06
with Magnetic Ride Control) or any of the Performance Traction Management modes are selected (Z51 and Z06 with Magnetic Ride Control). The TCS light comes on the instrument cluster and the appropriate DIC message displays.. The vehicle is not moving. . The steering wheel is pointing
straight.
Chevrolet Corvette Owner Manual (GMNA-Localizing-U.S./Canada/Mexico- 9085364) - 2016 - crc - 9/15/15
The Launch Control feature will initially limit engine speed as the driver rapidly applies the accelerator pedal to wide open throttle. Allow the engine rpm to stabilize. A smooth, quick release of the brake pedal, while maintaining the fully pressed accelerator pedal, will manage wheel slip. After the vehicle is launched, the system continues in Competitive Driving Mode (except Z51 and Z06
with Magnetic Ride Control) or Performance Traction Management (Z51 and Z06 with Magnetic Ride Control). Competitive Driving Mode, PTM, and Launch Control are systems designed for a closed course race track and not intended for use on public roads. The systems are not intended to compensate for lack of driver experience or familiarity with the race track.Manual Transmissions . The clutch is pressed and the
vehicle is in 1 (First) gear.
. The accelerator pedal is rapidly
applied to wide open throttle. The Launch Control feature will initially limit engine speed as the driver rapidly applies the accelerator pedal to wide open throttle. Allow the engine rpm to stabilize. A smooth, quick release of the clutch, while maintaining the fully pressed accelerator pedal, will manage wheel slip. Complete shifts as described in Manual Transmission 0 187.
Automatic Transmissions . The brake pedal must be firmly pressed to the floor, equivalent to a panic brake event.
. The accelerator pedal is rapidly applied to wide open throttle. (If the vehicle rolls due to wide open throttle, release the throttle, press the brake pedal more firmly, and re-apply the accelerator to wide open throttle.)
Driving and Operating
201
Limited-Slip Differential (Except Z51 and Z06) If equipped, the mechanical limited-slip differential can give more traction on snow, mud, ice, sand, or gravel. It works like a standard axle most of the time, but when traction is low, this feature allows the drive wheel with the most traction to move the vehicle. For vehicles with limited slip differential, driven under severe conditions, the rear axle fluid should be changed. See Competitive Driving Mode 0 198 and Maintenance Schedule 0 298.
Chevrolet Corvette Owner Manual (GMNA-Localizing-U.S./Canada/Mexico- 9085364) - 2016 - crc - 9/15/15
202
Driving and Operating
Limited-Slip Differential (Z51 and Z06 Only) If equipped, the Electronic Limited-Slip Differential (ELSD) is automatically activated. ELSD actively monitors vehicle sensors and driver inputs to determine the amount of change for the conditions. With ELSD, the vehicle has: . Enhanced high-speed control.
Improved traction through corners, allowing more acceleration.
. More precise steering.
Increased vehicle agility. Integration with StabiliTrak. For vehicles with ELSD, driven under severe conditions, the rear axle fluid should be changed. See Competitive Driving Mode 0 198
and Maintenance Schedule 0 298.Cruise Control With cruise control, a speed of about 40 km/h (25 mph) or more can be maintained without keeping your foot on the accelerator. Cruise control does not work at speeds below about 40 km/h (25 mph).
{ Warning
Cruise control can be dangerous where you cannot drive safely at a steady speed. Do not use cruise control on winding roads or in heavy traffic. Cruise control can be dangerous on slippery roads. On such roads, fast changes in tire traction can cause excessive wheel slip, and you could lose control. Do not use cruise control on slippery roads.
If equipped with a manual transmission, the cruise control will remain active when the gears are shifted. The cruise is disengaged if the clutch is pressed for several seconds.
If the Traction Control System (TCS) begins to limit wheel spin while you are using cruise control, the cruise control automatically disengages. See Traction Control/Electronic Stability Control 0 192. When road conditions allow for using safely again, cruise control can be turned back on. If the brakes are applied, cruise control disengages.
1 (On/Off) : Press to turn cruise control on or off. A white indicator comes on in the instrument cluster when cruise is turned on.
Chevrolet Corvette Owner Manual (GMNA-Localizing-U.S./Canada/Mexico- 9085364) - 2016 - crc - 9/15/15
RES/+ (Resume/Accelerate) : If there is a set speed in memory, press briefly to resume to that speed or press and hold to accelerate. If cruise control is already active, use to increase vehicle speed. SET/– (Set/Coast) : Press briefly to set the speed and activate cruise control. If cruise control is already active, use to decrease vehicle speed. * (Cancel) : Press to disengage cruise control without erasing the set speed from memory.
Setting Cruise Control If 1 is on when not in use, SET/– or RES/+ could get pressed and go into cruise when not desired. Keep 1 off when cruise is not being used. 1. Press 1 to turn the cruise
system on.
2. Get up to the desired speed. 3. Press and release SET/– on
the steering wheel.
4. Remove foot from the
accelerator.
The cruise control indicator on the instrument cluster turns green after cruise control has been set to the desired speed. See Instrument Cluster 0 96.
Resuming a Set Speed If the cruise control is set at a desired speed and then the brakes are applied or * is pressed, the cruise control is disengaged without erasing the set speed from memory. Once the vehicle reaches about 40 km/h (25 mph) or more, briefly press RES/+. The vehicle returns to the previous set speed.
Increasing Speed While Using Cruise Control If the cruise control system is already activated, . Press and hold RES/+ until the desired speed is reached, then release it.
Driving and Operating
203
. To increase vehicle speed in
small increments, briefly press RES/+. For each press, the vehicle goes about 1.6 km/h (1 mph) faster.
The speedometer reading can be displayed in either English or metric units. See Instrument Cluster 0 96. The increment value used depends on the units displayed.
Reducing Speed While Using Cruise Control If the cruise control system is already activated: . Press and hold SET/– until the desired lower speed is reached, then release it.
. To decrease the vehicle speed in
small increments, briefly press SET/–. For each press, the vehicle goes about 1.6 km/h (1 mph) slower.
The speedometer reading can be displayed in either English or metric units. See Instrument Cluster 0 96. The increment value used depends on the units displayed.
Chevrolet Corvette Owner Manual (GMNA-Localizing-U.S./Canada/Mexico- 9085364) - 2016 - crc - 9/15/15
204
Driving and Operating
Passing Another Vehicle While Using Cruise Control Use the accelerator pedal to increase the vehicle speed. When you take your foot off the pedal, the vehicle will slow down to the previously set cruise speed. While pressing the accelerator pedal or shortly following the release to override cruise control, briefly pressing SET/– will result in cruise set to the current vehicle speed.
Using Cruise Control on Hills How well the cruise control works on hills depends upon the vehicle speed, load, and the steepness of the hills. When going up steep hills, you might have to step on the accelerator pedal to maintain your speed. When going downhill, you might have to brake or shift to a lower gear to keep your speed down. If the brake pedal is applied, cruise control will disengage.
gear for the terrain or select D (Drive) on the shift lever for full automatic transmission operation.
Ending Cruise Control . Step lightly on the brake pedal. . Press the clutch pedal for several seconds or shift to N (Neutral) (manual transmissions).
. Shift the transmission to
N (Neutral) (automatic transmissions).
. Press *. . To turn off cruise control,
press 1.
Erasing Speed Memory The cruise control set speed is erased from memory if 1 is pressed or if the ignition is turned off.
Cruise Control in Manual Paddle Shift Gear Selection When the vehicle is in M (Manual Mode) and the manual paddle shift controls are not being used, cruise control operates in the same manner as D (Drive). When the vehicle is in M (Manual Mode) and the manual paddle shift controls are being used, cruise control operates as follows:
If cruise control is active and a gear is selected with the manual paddle shift controls, the vehicle speed is maintained in the driver selected gear and will not automatically upshift or downshift the transmission while the driver’s gear selection is active. If driving in hilly terrain, cruise control may not be able to maintain vehicle speed if an upshift or downshift is not selected by the driver. While driving on hilly terrain and cruise control is active with a manual paddle shift gear selection, the driver must select the proper
Chevrolet Corvette Owner Manual (GMNA-Localizing-U.S./Canada/Mexico- 9085364) - 2016 - crc - 9/15/15
Driving and Operating
205
Driver Assistance Systems
Assistance Systems for Parking or Backing If equipped, the Rear Vision Camera (RVC) and Curb View Camera may help the driver park or avoid objects. Always check around the vehicle when parking or backing.
Rear Vision Camera (RVC) When the vehicle is shifted into R (Reverse), the RVC displays an image of the area behind the vehicle in the center stack display. The previous screen displays when the vehicle is shifted out of R (Reverse) after a short delay. To return to the previous screen sooner, press a button on the infotainment system, shift into P (Park), or reach a vehicle speed of 8 km/h (5 mph).
The camera is above the license plate.
1. View displayed by the
camera.
1. View displayed by the
camera.
2. Corner of the rear bumper. Displayed images may be farther or closer than they appear. The area displayed is limited and objects that are close to either corner of the bumper or under the bumper do not display.
Chevrolet Corvette Owner Manual (GMNA-Localizing-U.S./Canada/Mexico- 9085364) - 2016 - crc - 9/15/15
206
Driving and Operating
Curb View Camera
If equipped, a view of the area in front of the vehicle displays in the center stack screen. The display shows a front, top down view at the top and left and right front camera images on the bottom. The front view shows after shifting from R (Reverse) to a forward gear, or by pressing CAMERA in the center stack, and when the vehicle is moving forward slower than 8 km/h (5 mph). The front cameras are on both sides of the front fascia.
{ Warning
The camera(s) do not display children, pedestrians, bicyclists, crossing traffic, animals, or any other object outside of the cameras’ field of view, below the bumper, or under the vehicle. Shown distances may be different from actual distances. Do not drive or park the vehicle using only these camera(s). Always check behind and around the vehicle before driving. Failure to use proper care may result in injury, death, or vehicle damage.
Turning the Features On or Off To turn off the guidance lines: 1. On the infotainment system,
press the Settings screen button, or turn the MENU knob to highlight Settings and press MENU.
2. Select Rear Camera. 3. Select Guidance Lines and
then select Off or On.
Fuel Use of the recommended fuel is an important part of the proper maintenance of this vehicle. When driving in the U.S. and Canada, to help keep the engine clean and maintain optimum vehicle performance, we recommend TOP TIER Detergent Gasolines. See www.toptiergas.com for a list of TOP TIER Detergent Gasolines.
If equipped with the LT1 engine, use premium unleaded gasoline meeting ASTM specification D4814 with a posted octane rating of 91 or higher. Regular unleaded gasoline rated at
Chevrolet Corvette Owner Manual (GMNA-Localizing-U.S./Canada/Mexico- 9085364) - 2016 - crc - 9/15/15
87 octane or higher can be used, but acceleration and fuel economy will be reduced, and an audible knocking noise may be heard. If this occurs, use a gasoline rated at 91 octane or higher as soon as possible. Otherwise, the engine could be damaged. If heavy knocking is heard when using gasoline with a 91 octane rating or higher, the engine needs service. If equipped with the LT4
supercharged engine, use premium unleaded gasoline meeting ASTM specification D4814 with a posted octane rating of 91 or higher. If the octane is less than 91, damage to the engine may occur and may void the vehicle warranty. If heavy knocking is heard when using gasoline rated at 91 octane or higher, the engine needs service.Use of Seasonal Fuels Use summer and winter fuels in the appropriate season. The fuels industry automatically modifies the fuel for the appropriate season. If fuel is left in the vehicle tank for long periods of time, driving or
starting could be affected. Drive the vehicle until the fuel is at one-half tank or less, then refuel with the current seasonal fuel.
Prohibited Fuels Gasolines containing oxygenates such as ethers and ethanol, as well as reformulated gasolines, are available in some cities. If these gasolines comply with the previously described specification, then they are acceptable to use. However, E85 (85% ethanol) and other fuels containing more than 15% ethanol must be used only in FlexFuel vehicles.
Caution
Do not use fuel containing methanol. It can corrode metal parts in the fuel system and also damage plastic and rubber parts. That damage would not be covered under the vehicle warranty.
Driving and Operating
207
Some gasolines, mainly high octane racing gasolines, can contain an octane-enhancing additive called methylcyclopentadienyl manganese tricarbonyl (MMT). Do not use gasolines and/or fuel additives with MMT as they can reduce spark plug life and affect emission control system performance. The malfunction indicator lamp may turn on. If this occurs, see your dealer for service.
California Fuel Requirements If the vehicle is certified to meet California Emissions Standards, it is designed to operate on fuels that meet California specifications. See the underhood emission control label. If this fuel is not available in states adopting California Emissions Standards, the vehicle will operate satisfactorily on fuels meeting federal specifications, but emission control system performance might be affected. The malfunction indicator lamp could turn on and the
Chevrolet Corvette Owner Manual (GMNA-Localizing-U.S./Canada/Mexico- 9085364) - 2016 - crc - 9/15/15
208
Driving and Operating
vehicle may not pass a smog-check test. See Malfunction Indicator Lamp (Check Engine Light) 0 106. If this occurs, return to your authorized dealer for diagnosis. If it is determined that the condition is caused by the type of fuel used, repairs may not be covered by the vehicle warranty.
Fuels in Foreign Countries If planning to drive in countries outside the U.S. or Canada, the proper fuel might be hard to find. Check regional auto club or fuel retail brand websites for availability in the country where driving. Never use leaded gasoline, fuel containing methanol, manganese, or any other fuel not recommended. Costly repairs caused by use of improper fuel would not be covered by the vehicle warranty.
Fuel Additives To keep fuel systems clean, TOP TIER Detergent Gasoline is recommended. See Fuel 0 206. If TOP TIER Detergent Gasoline is not available, one bottle of Fuel System Treatment PLUS added to the fuel tank at every engine oil change, can help. Fuel System Treatment PLUS is the only gasoline additive recommended by General Motors. It is available at your dealer.
Filling the Tank
{ Warning
Fuel vapors and fuel fires burn violently and can cause injury or death.
. To help avoid injuries to you and others, read and follow all the instructions on the fuel pump island.
(Continued)
Warning (Continued)
. Turn off the engine when
refueling.
. Keep sparks, flames, and
smoking materials away from fuel.
. Do not leave the fuel pump
unattended.
. Do not use a cell phone
while refueling.
. Do not reenter the vehicle
while pumping fuel.
. Keep children away from
the fuel pump and never let children pump fuel.
. Fuel can spray out if the
refueling nozzle is inserted too quickly. This spray can happen if the tank is nearly full, and is more likely in hot weather. Insert the refueling nozzle slowly and wait for any hiss noise to stop prior to beginning to flow fuel
Chevrolet Corvette Owner Manual (GMNA-Localizing-U.S./Canada/Mexico- 9085364) - 2016 - crc - 9/15/15
Driving and Operating
209
Warning (Continued)
shutting off the pump or by notifying the station attendant. Leave the area immediately.
Filling the Tank With a Portable Gas Can If the vehicle runs out of fuel and must be filled from a portable gas can:
1. Locate the capless funnel
2.
adapter from inside the vehicle. Insert and latch the funnel into the capless fuel system.
{ Warning
Overfilling the fuel tank by more than three clicks of a standard fill nozzle may cause:
. Vehicle performance issues, including engine stalling and damage to the fuel system.
. Fuel spills. . Potential fuel fires.
Be careful not to spill fuel. Wait a few seconds before removing the nozzle. After initial shutoff, do not partially remove the nozzle to add more fuel as this will result in fuel spillage. Clean fuel from painted surfaces as soon as possible. See Exterior Care 0 288.
{ Warning
If a fire starts while you are refueling, do not remove the nozzle. Shut off the flow of fuel by (Continued)
To open the fuel door, push and release the rearward center edge of the door. The fuel door is locked when the vehicle doors are locked. Press K on the RKE transmitter to unlock. The driver door must be opened before the fuel door will unlock. The vehicle has a capless refueling system and does not have a fuel cap. The filling nozzle must be fully inserted and latched prior to starting fuel flow.
Trailer Towing
General Towing Information The vehicle is neither designed nor intended to tow a trailer.
Chevrolet Corvette Owner Manual (GMNA-Localizing-U.S./Canada/Mexico- 9085364) - 2016 - crc - 9/15/15
210
Driving and Operating
{ Warning
Attempting to refuel without using the funnel adapter may cause fuel spillage and damage the capless fuel system. This could cause a fire and you or others could be badly burned and the vehicle could be damaged.
3. Remove and clean the funnel
adapter and return it to the storage location.
Filling a Portable Fuel Container
{ Warning
Filling a portable fuel container while it is in the vehicle can cause fuel vapors that can ignite either by static electricity or other means. You or others could be badly burned and the vehicle could be damaged. Always:
(Continued)
Warning (Continued)
. Use approved fuel
containers.
. Remove the container from the vehicle, trunk, or pickup bed before filling.
. Place the container on the
ground.
. Place the nozzle inside the fill opening of the container before dispensing fuel, and keep it in contact with the fill opening until filling is complete.
. Fill the container no more than 95% full to allow for expansion.
. Do not smoke, light
matches, or use lighters while pumping fuel.
. Avoid using cell phones or
other electronic devices.
Chevrolet Corvette Owner Manual (GMNA-Localizing-U.S./Canada/Mexico- 9085364) - 2016 - crc - 9/15/15
Driving and Operating
211
Conversions and Add-Ons
Add-On Electrical Equipment
{ Warning
The Data Link Connector (DLC) is used for vehicle service and Emission Inspection/Maintenance testing. See Malfunction Indicator Lamp (Check Engine Light) 0 106. A device connected to the DLC — such as an aftermarket fleet or driver-behavior tracking device — may interfere with vehicle systems. This could affect vehicle operation and cause a crash. Such devices may also access information stored in the vehicle’s systems.
Caution
Some electrical equipment can damage the vehicle or cause components to not work and would not be covered by the vehicle warranty. Always check with your dealer before adding electrical equipment.
Add-on equipment can drain the vehicle's 12-volt battery, even if the vehicle is not operating. The vehicle has an airbag system. Before attempting to add anything electrical to the vehicle, see Servicing the Airbag-Equipped Vehicle 0 76 and Adding Equipment to the Airbag-Equipped Vehicle 0 76.
Chevrolet Corvette Owner Manual (GMNA-Localizing-U.S./Canada/Mexico- 9085364) - 2016 - crc - 9/15/15
Vehicle Care
212
Vehicle CareGeneral Information
General Information . . . . . . . . . . 213
California Proposition65 Warning . . . . . . . . . . . . . . . . . 213
California Perchlorate
Materials Requirements . . . . . 213
Accessories and
Modifications . . . . . . . . . . . . . . . . 213
Lifting the Vehicle . . . . . . . . . . . . 214Vehicle Checks Doing Your Own
Service Work . . . . . . . . . . . . . . . 216
Hood . . . . . . . . . . . . . . . . . . . . . . . . . 217
Engine CompartmentOverview . . . . . . . . . . . . . . . . . . . . 218
Engine Oil . . . . . . . . . . . . . . . . . . . . 223
Engine Oil Life System . . . . . . . 228
Automatic TransmissionFluid . . . . . . . . . . . . . . . . . . . . . . . . 229
Manual Transmission Fluid . . . 229
Hydraulic Clutch . . . . . . . . . . . . . . 230
Engine Air Cleaner/Filter . . . . . . 230
Cooling System (Engine) . . . . . 232
Cooling System (AeroPanel) . . . . . . . . . . . . . . . . . . . . . . . 234
Engine Coolant . . . . . . . . . . . . . . . 235
Engine Overheating . . . . . . . . . . 237Washer Fluid . . . . . . . . . . . . . . . . . 238
Brakes . . . . . . . . . . . . . . . . . . . . . . . 239
Brake Fluid . . . . . . . . . . . . . . . . . . . 240
Battery - North America . . . . . . 241
Rear Axle . . . . . . . . . . . . . . . . . . . . 242
Starter Switch Check . . . . . . . . . 243
Automatic Transmission ShiftLock Control Function Check . . . . . . . . . . . . . . . . . . . . . . . 243
Park Brake and P (Park)
Mechanism Check . . . . . . . . . . 244
Wiper Blade Replacement . . . . 244
Windshield Replacement . . . . . 245Headlamp Aiming
Headlamp Aiming . . . . . . . . . . . . 245
Bulb Replacement
Bulb Replacement . . . . . . . . . . . . 245
High Intensity Discharge (HID)Lighting . . . . . . . . . . . . . . . . . . . . . 245
LED Lighting . . . . . . . . . . . . . . . . . 246
License Plate Lamp . . . . . . . . . . 246
Replacement Bulbs . . . . . . . . . . . 246Electrical System
Electrical System Overload . . . 247
Fuses . . . . . . . . . . . . . . . . . . . . . . . . 247
Engine Compartment FuseBlock . . . . . . . . . . . . . . . . . . . . . . . . 247
Rear Compartment Fuse
Block . . . . . . . . . . . . . . . . . . . . . . . . 251
Wheels and Tires
Tires . . . . . . . . . . . . . . . . . . . . . . . . . . 254
Winter Tires . . . . . . . . . . . . . . . . . . 255
Run-Flat Tires . . . . . . . . . . . . . . . . 255
Low-Profile Tires . . . . . . . . . . . . . 256
Competition Oriented Tires . . . 257
Summer Tires . . . . . . . . . . . . . . . . 258
Tire Sidewall Labeling . . . . . . . . 258
Tire Designations . . . . . . . . . . . . . 259
Tire Terminology andDefinitions . . . . . . . . . . . . . . . . . . 260
Tire Pressure . . . . . . . . . . . . . . . . . 262
Tire Pressure for High-SpeedOperation . . . . . . . . . . . . . . . . . . . 264
Tire Pressure Monitor
System . . . . . . . . . . . . . . . . . . . . . . 265
Tire Pressure Monitor
Operation . . . . . . . . . . . . . . . . . . . 266
Tire Inspection . . . . . . . . . . . . . . . . 268
Tire Rotation . . . . . . . . . . . . . . . . . 268
When It Is Time for NewTires . . . . . . . . . . . . . . . . . . . . . . . . 269
Buying New Tires . . . . . . . . . . . . . 270
Different Size Tires andWheels . . . . . . . . . . . . . . . . . . . . . . 271
Uniform Tire Quality
Grading . . . . . . . . . . . . . . . . . . . . . 271
Wheel Alignment and Tire
Balance . . . . . . . . . . . . . . . . . . . . . 273
Wheel Replacement . . . . . . . . . . 273
Tire Chains . . . . . . . . . . . . . . . . . . . 275Chevrolet Corvette Owner Manual (GMNA-Localizing-U.S./Canada/Mexico- 9085364) - 2016 - crc - 9/15/15
If a Tire Goes Flat . . . . . . . . . . . . 275
Tire Sealant andCompressor Kit . . . . . . . . . . . . . 276
Storing the Tire Sealant and
Compressor Kit . . . . . . . . . . . . . 283
Jump Starting
Jump Starting - North
America . . . . . . . . . . . . . . . . . . . . . 284
Towing the Vehicle
Towing the Vehicle . . . . . . . . . . . 287
Recreational VehicleTowing . . . . . . . . . . . . . . . . . . . . . . 287
Appearance Care
Exterior Care . . . . . . . . . . . . . . . . . 288
Interior Care . . . . . . . . . . . . . . . . . . 292
Floor Mats . . . . . . . . . . . . . . . . . . . . 295General Information For service and parts needs, visit your dealer. You will receive genuine GM parts and GM-trained and supported service people. Genuine GM parts have one of these marks:
California Proposition 65 Warning WARNING: Most motor vehicles, including this one, contain and/or emit chemicals known to the State of California to cause cancer and birth defects or other reproductive
Vehicle Care
213
harm. Engine exhaust, many parts and systems, many fluids, and some component wear by-products contain and/or emit these chemicals. See Battery - North America 0 241
and Jump Starting - North America 0 284.California Perchlorate Materials Requirements Certain types of automotive applications, such as airbag initiators, safety belt pretensioners, and lithium batteries contained in Remote Keyless Entry transmitters, may contain perchlorate materials. Special handling may be necessary. For additional information, see www.dtsc.ca.gov/hazardouswaste/ perchlorate.
Accessories and Modifications Adding non-dealer accessories or making modifications to the vehicle can affect vehicle performance and safety, including such things as
Chevrolet Corvette Owner Manual (GMNA-Localizing-U.S./Canada/Mexico- 9085364) - 2016 - crc - 9/15/15
214
Vehicle Care
airbags, braking, stability, ride and handling, emissions systems, aerodynamics, durability, and electronic systems like antilock brakes, traction control, and stability control. These accessories or modifications could even cause malfunction or damage not covered by the vehicle warranty. Damage to suspension components caused by modifying vehicle height outside of factory settings will not be covered by the warranty. Damage to vehicle components resulting from modifications or the installation or use of non-GM certified parts, including control module or software modifications, is not covered under the terms of the vehicle warranty and may affect remaining warranty coverage for affected parts. GM Accessories are designed to complement and function with other systems on the vehicle. See your dealer to accessorize the vehicle using genuine GM Accessories installed by a dealer technician.
Also, see Adding Equipment to the Airbag-Equipped Vehicle 0 76.
{ Warning
Lifting the Vehicle { Warning
Lifting a vehicle can cause an injury. The vehicle can slip off the jack and roll over you or other people. You and they could be badly injured. Find a level place to lift your vehicle. To help prevent the vehicle from moving: 1. Set the parking brake firmly. 2. Put an automatic
transmission in P (Park) or a manual transmission in 1 (First) or R (Reverse).
3. Turn off the engine.
To be even more certain the vehicle will not move, put blocks in front of and behind the wheels.
Getting under a vehicle when it is lifted on a jack is dangerous. If the vehicle slips off the jack, you could be badly injured or killed. Never get under a vehicle when it is supported only by a jack.
{ Warning
Raising the vehicle with the jack improperly positioned can damage the vehicle or the vehicle may fall and cause injury to you or others.
If a jack is used to lift the vehicle, follow the instructions that came with the jack, and be sure to use the correct lifting points to avoid damaging the vehicle.
Chevrolet Corvette Owner Manual (GMNA-Localizing-U.S./Canada/Mexico- 9085364) - 2016 - crc - 9/15/15
Caution
Lifting the vehicle improperly can damage it and result in costly repairs not covered by the vehicle warranty. To lift the vehicle properly and prevent vehicle damage:
. Be sure to place a block or pad between the jack and the vehicle.
. Lift only in the areas shown in the following illustrations.
For additional information, see your dealer and the Chevrolet Corvette service manual.
Caution
The front jack pads must not contact the rocker panels, the front fenders, or the floor pan. If they do, damage may occur.
Vehicle Care
215
2. Place a block or pad between
the jack and the vehicle.
3. Lift the vehicle with the jack. Lifting from the Front – Frame
Lifting from the Front – Cradle The front lifting points can be accessed from either side of the vehicle, behind the front tires.
Use only a service jack with a lifting pad diameter of 64 mm (2.5 in) or smaller, and thick enough to make sure the jack does not contact the vehicle body. Position the service jack and lifting pad under the frame rail shipping slot reinforcement.
1. Locate the front lifting points.
Chevrolet Corvette Owner Manual (GMNA-Localizing-U.S./Canada/Mexico- 9085364) - 2016 - crc - 9/15/15
216
Vehicle Care
Lifting from the Rear – Cradle The rear lifting points can be accessed from the rear driver or passenger side of the vehicle.
Lifting from the Rear – Frame
Vehicle Checks
1. Locate the rear lifting points. 2. Place a block or pad between
the jack and the vehicle.
3. Lift the vehicle with the jack.
Use only a service jack with a lifting pad diameter of 64 mm (2.5 in) or smaller, and thick enough to make sure the jack does not contact the vehicle body. Position the service jack and lifting pad under the frame rail shipping slot reinforcement.